How to sell tickets on your Squarespace website in 2025
Did you know, there's two ways you can sell tickets on your Squarespace website?
I mean literally from your own Squarespace site.
There's no need to send your customers off to a third party website and hope they'll come back. Because often they won't. You worked hard for that traffic, don't let it go.
Even though Squarespace wasn't made with event tickets in mind, it's actually a great place to sell your event tickets. And in this article we're going to show you the best two ways to do it:
- Selling tickets using the built-in Squarespace Ecommerce system.
- Embedding a third party ticketing system onto your Squarespace website.
Why sell tickets from your Squarespace website
So you want to sell some event tickets? Ok great; so you probably know you could set up an Eventbrite account, create an event, and send all your traffic to them.
You'll see it time and time again when you want to attend an event. You click the 'book' button from a brand you trust and there's this jarring redirect; you get taken to a website you've never been to before. And then after you book, the ticketing platform covers the confirmation email in their branding...eugh.
There's so many reasons that it's better to own the whole process yourself:
- Keeps everything in one place. Your events, your branding, and your checkout all live under your domain. No weird redirects for your customers to websites they don't trust.
- Higher conversion rates. One of our customers 'Hanna Hart' from Upward Women saw her conversion rates increase by 161%. She switched away from Eventbrite and onto a system that was part of her own website.
- SEO benefits. All the links are to your website. Search engines (and AI now) see this as a sign of trust, and this can increase your rankings.
- Full control over your branding. Your attendees should only see your branding. This sounds so obvious as I type it, but it's not the norm.
- Better customer experience. Some things are hard to measure on a spreadsheet. There's something that feels right for the attendee when everything happens on your website. Make the booking experience smooth and this is only going to increase the chances of them booking with you again.
Which plan do I need to sell my tickets on Squarespace
This depends on whether you'll be using the Squarespace Commerce system or a third-party system (more on the pros and cons of each later):
Which Squarespace plan for ticketing with Squarespace Commerce. How much will it cost.
Squarespace have changed the names of all their plans recently. But, the good news is you can sell event tickets on any of the plans Squarespace offer. Each plan has different costs - the higher the value of the tickets you sell the higher plan you're going to want to use.
There's two parts of the pricing plans to look at:
- Credit card rates
- Online store transaction fee

The 'Basic' plan is unique in that it has a 2% 'Online store transaction fee' on top of the credit card rates. For a very small increase you can upgrade to the next plan up which completely removes this fee. This is likely to be an easy money saver for you.
Which plan for ticketing with an embedded third party
Any Squarespace plan will work apart from the basic plan. The 'credit card rates' and 'online store transaction fee' will be irrelevant because your ticket sales won't be processed by Squarespace, but by the third party system.
Unfortunately Squarespace does not allow Javascript embeds on the basic plan (which we need need to embed third party software).
Your Squarespace version is important when setting up Squarespace ticket sales
It's worth taking a moment to get to grips with which Squarespace version your website currently has. It will either be:
- Version 7.1; or
- Version 7.0
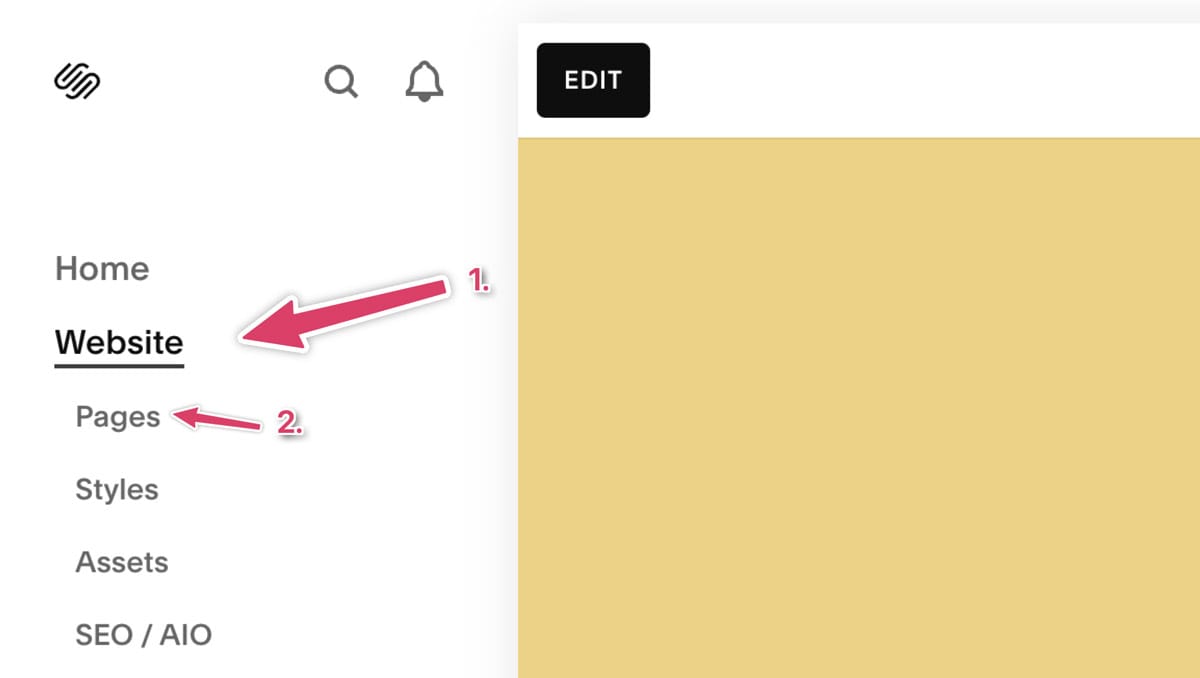
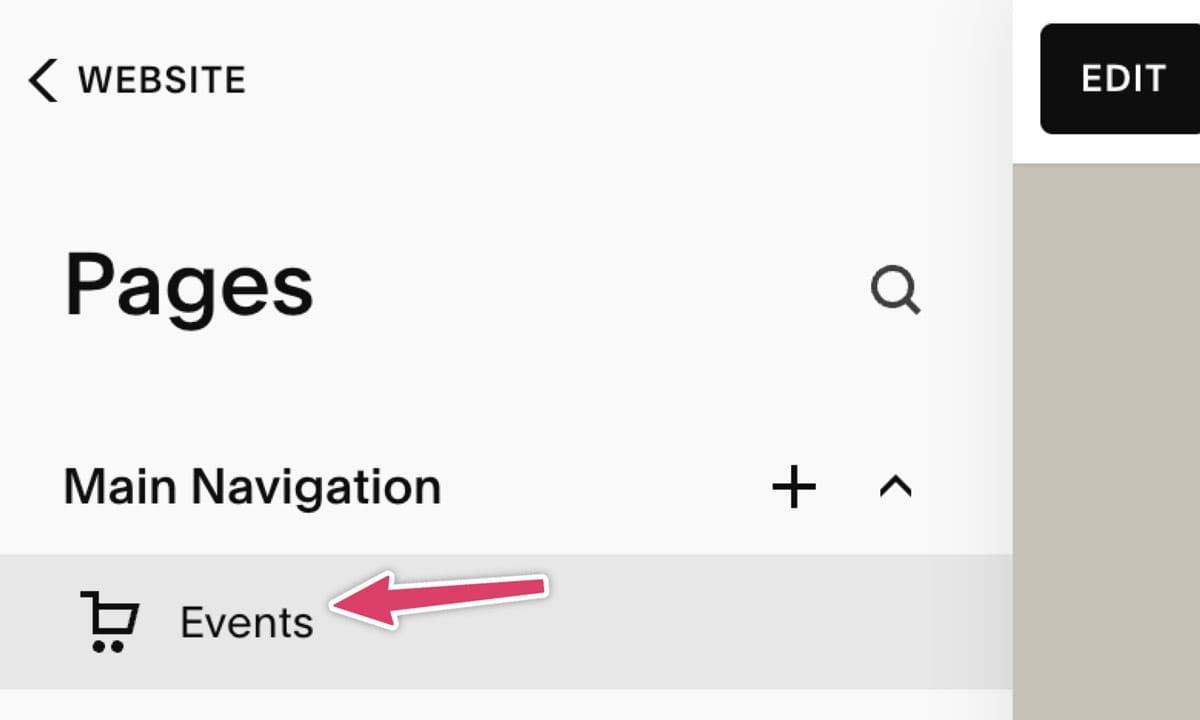
The easiest way to find out is to head to your Squarespace website editor and click Website -> Pages.
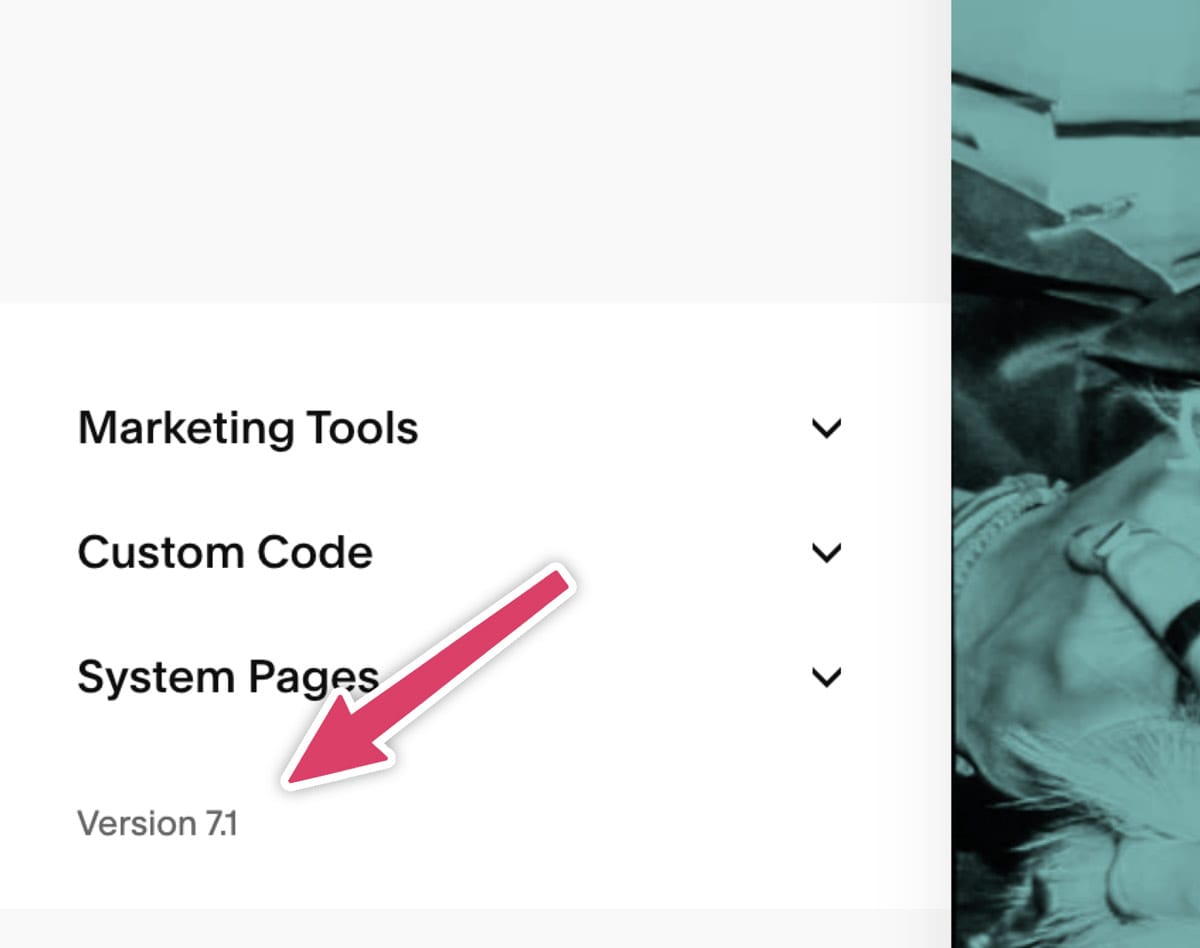
Once you've done that, scroll down and you should see your version number.
Don't worry if you're using either version, adding event ticket sales is possible with both, there is just some subtle differences, but I'll walk you right through this.
Option A: Selling event tickets on Squarespace with Squarespace Commerce
The best thing about using the built in commerce suit in Squarespace is that it's built in! There's no new software to figure out because Squarespace already includes what you need.
There's a few weaknesses with this option because Squarespace was never built with events in mind. However, if you're hosting a one-off event, or you don't host events very often Squarespace Commerce can be a great option. I'll walk you through the entire thing; including some tips and tricks I see other businesses use that get the most of out Squarespace Commerce.
All screenshots will be from Squarespace 7.1, but the process is similar for Squarespace 7.0 too. The only reason I'm not including screenshots for 7.0 is because it is almost identical.
Step one: Create a new store
Head back to your pages page:
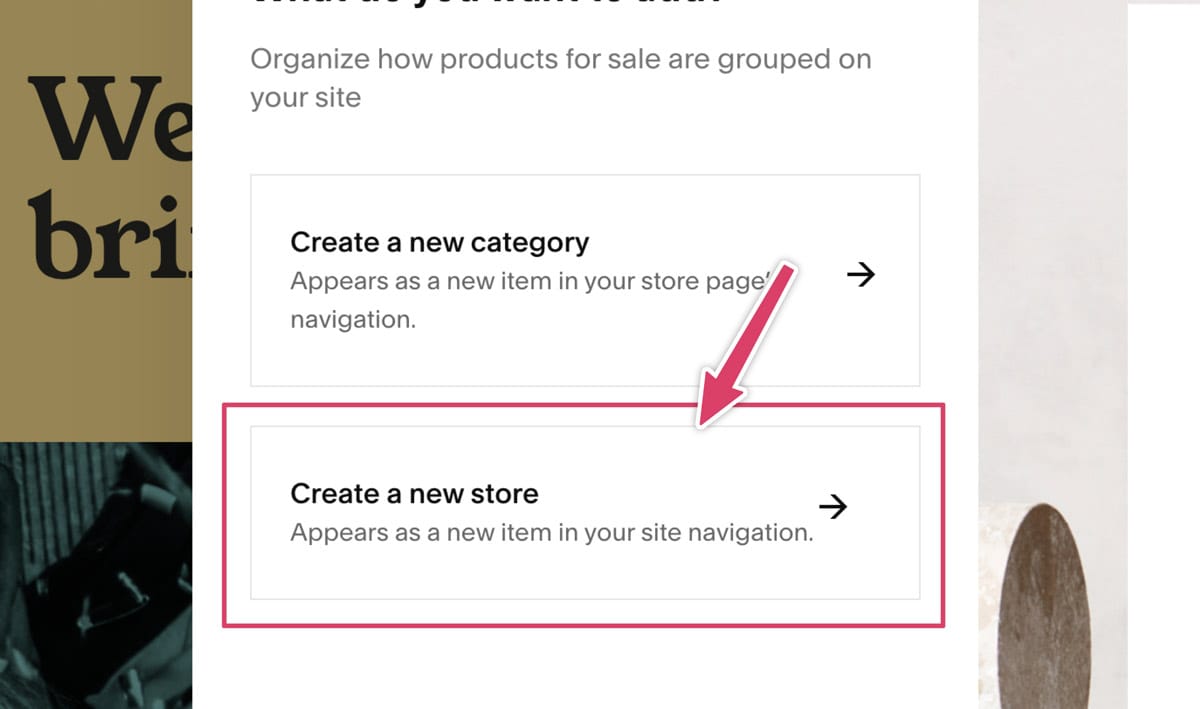
Next to Main Navigation click the + icon and click Store.

If you're using Squarespace 7.1 you'll then see some extra options. Click 'Create a new store'.
You then choose a starter layout for your store. I'd recommend picking the first one as this works best for events.
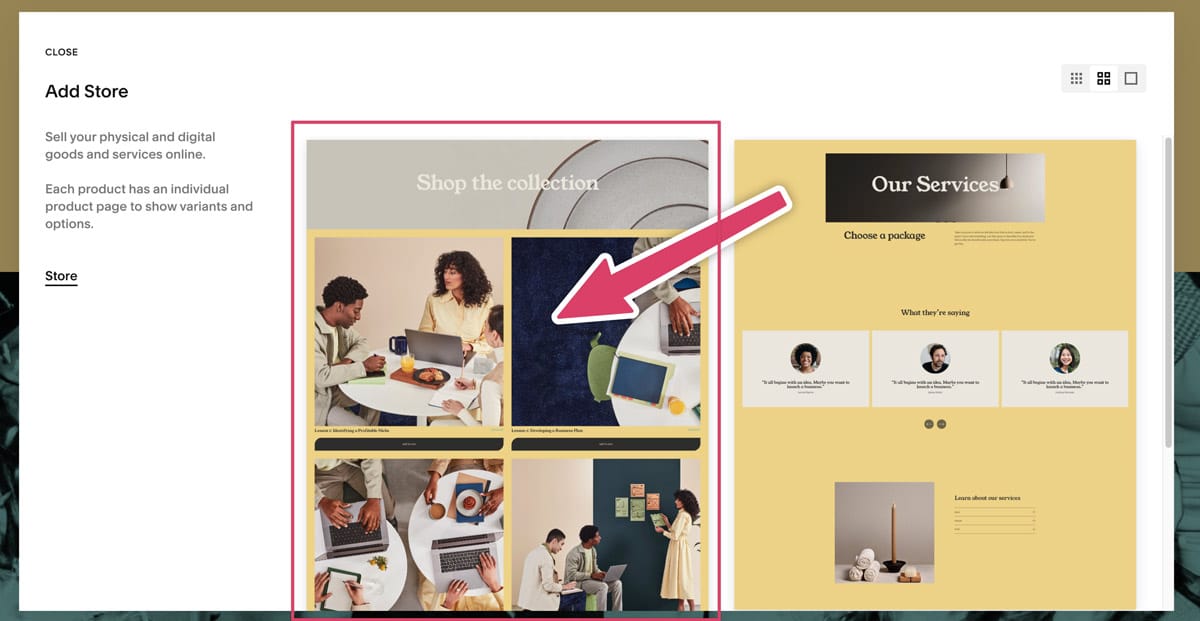
I'd also recommend naming this new page 'events'. Just to keep things organised.
The 'store' is where all your products will live. Remember, Squarespace wasn't built for events so it has the concept of 'products', and we'll be using 'products' for our events.
Step two: Create an event (product)
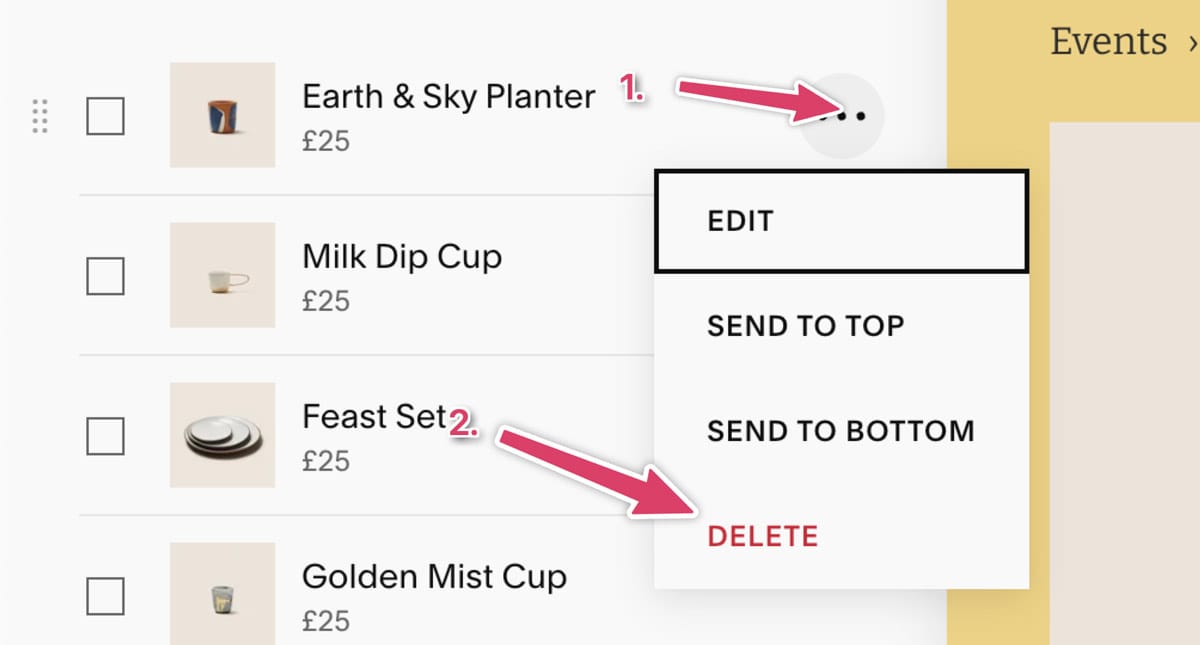
Sometimes when you create a 'store' Squarespace creates a bunch of test products. Feel free to go ahead and delete these.
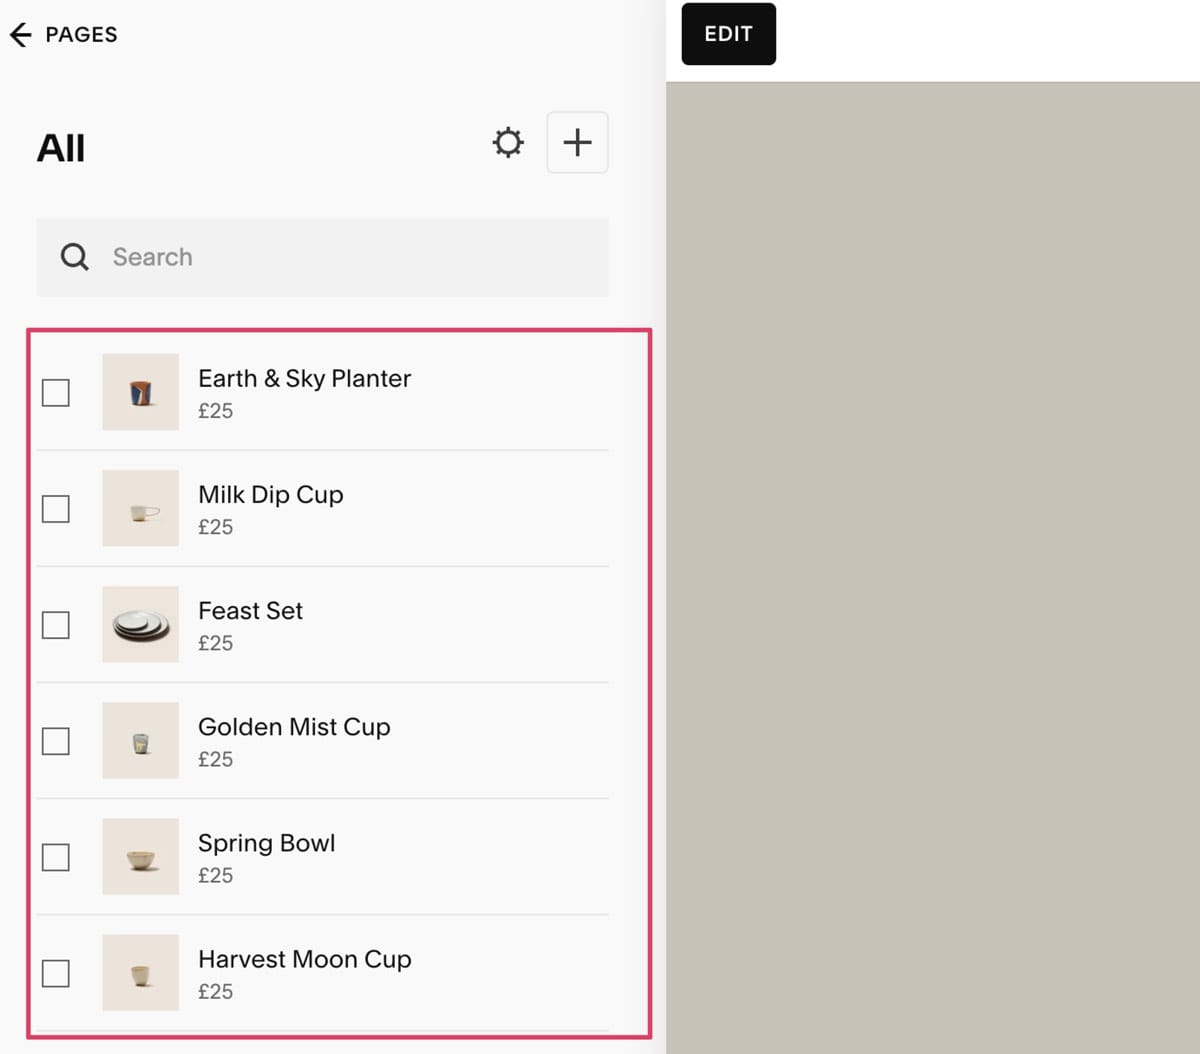
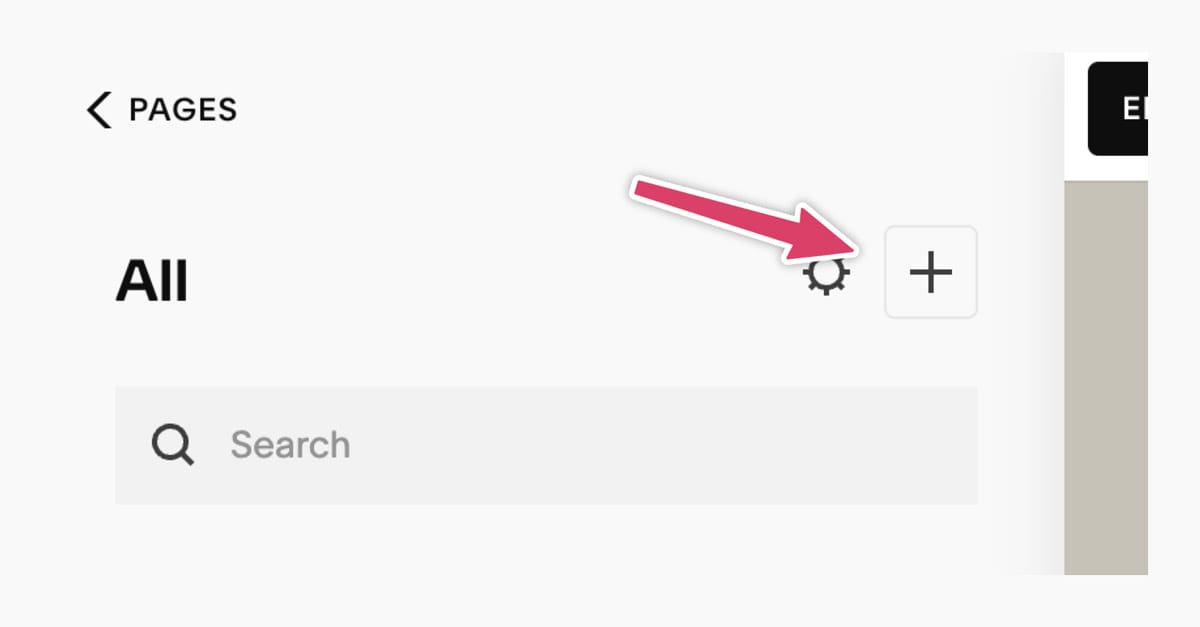
Ok - let's create our first event! Click the + icon to add a product.
Select service for the type of product you'll be selling.
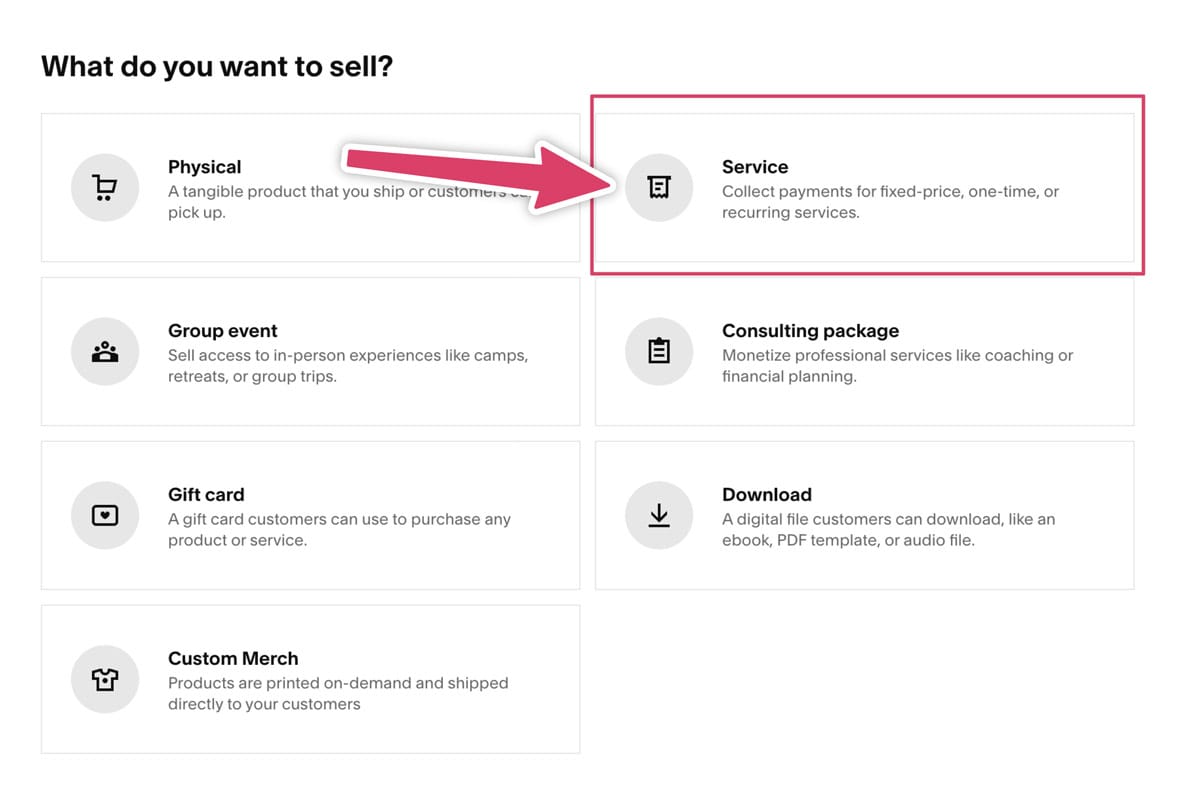
What's a bit confusing is that Squarespace has a 'group event' option. Unfortunately it doesn't do anything useful and creates a 'service' product in the background. So let's just go ahead and choose that.
Step three: Configuring your event
You should now be in the product editor. It looks something like this:
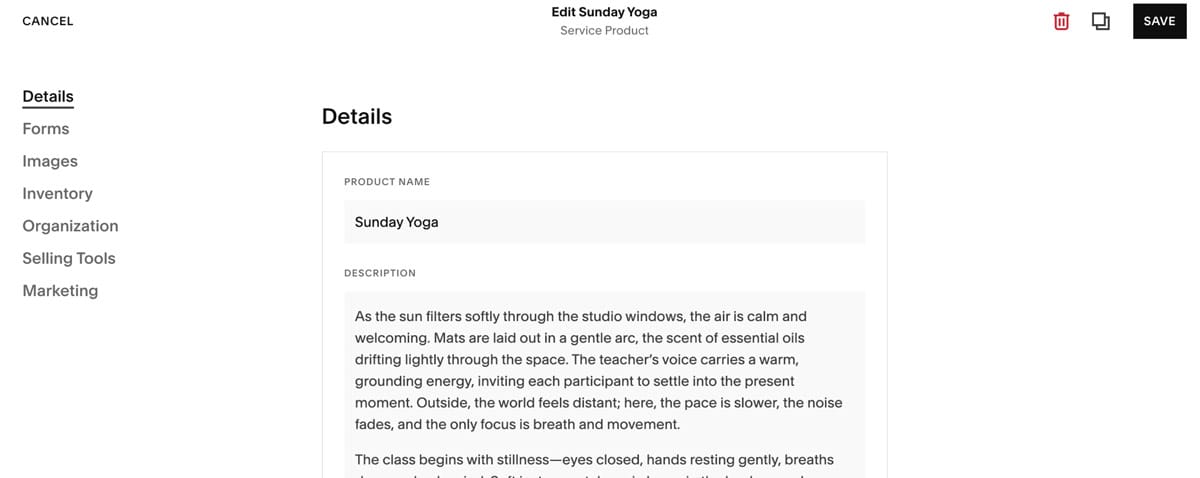
There's a few different parts of the product editor that are super important to adding events to a Squarespace website. I'll talk you through it...
Product name and description - This is a little obvious so I won't dig into that.
Forms - You can use 'forms' to collect extra information from the attendee. For example, you might need to know: their food allergies, telephone number and previous experience. Without using forms the only information you're going to get is their name and email address.
We've written all about how create a great event registration form. The trick is to only ask for the information you absolutely need.
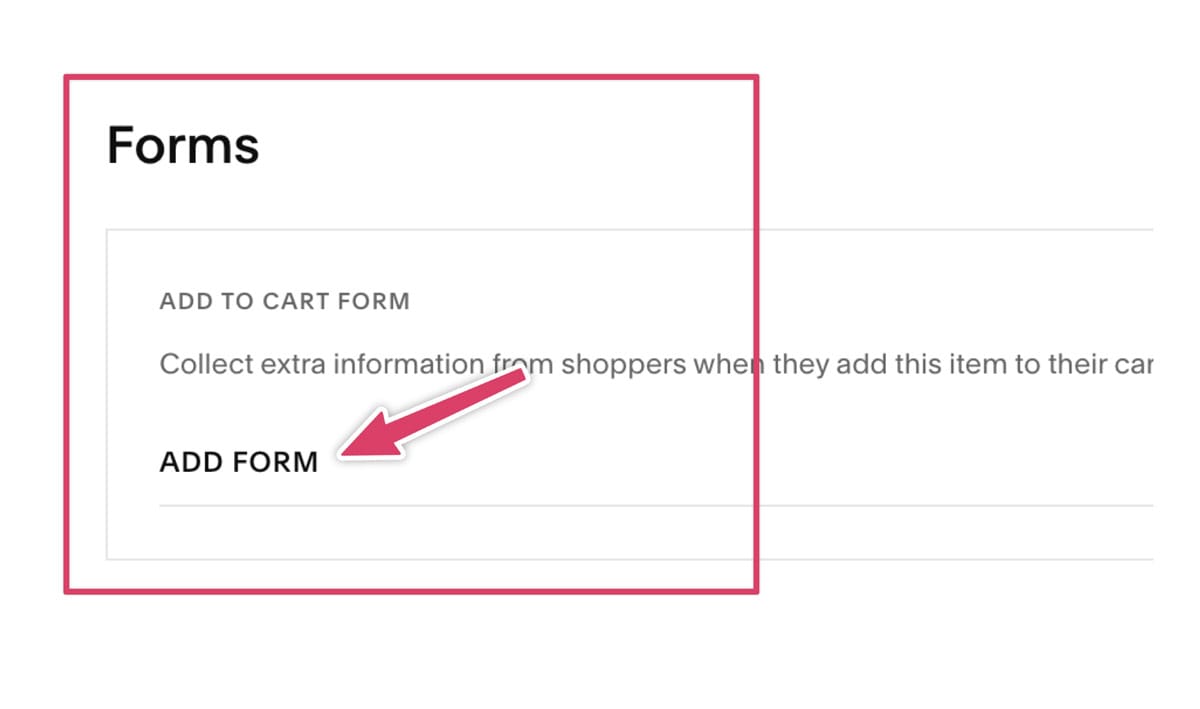
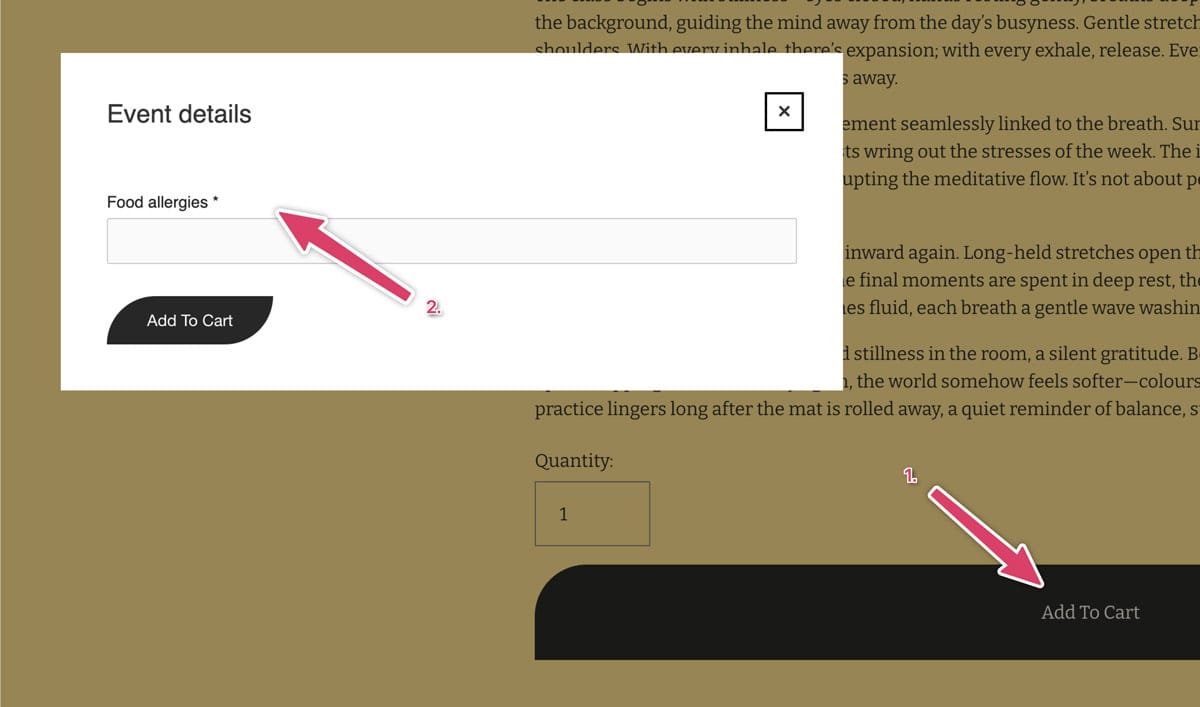
Once you've created a form, it will show for the attendee once they click the 'Add to Cart' button on the event.
Inventory - This is where you'll decide how many people can come to your event.
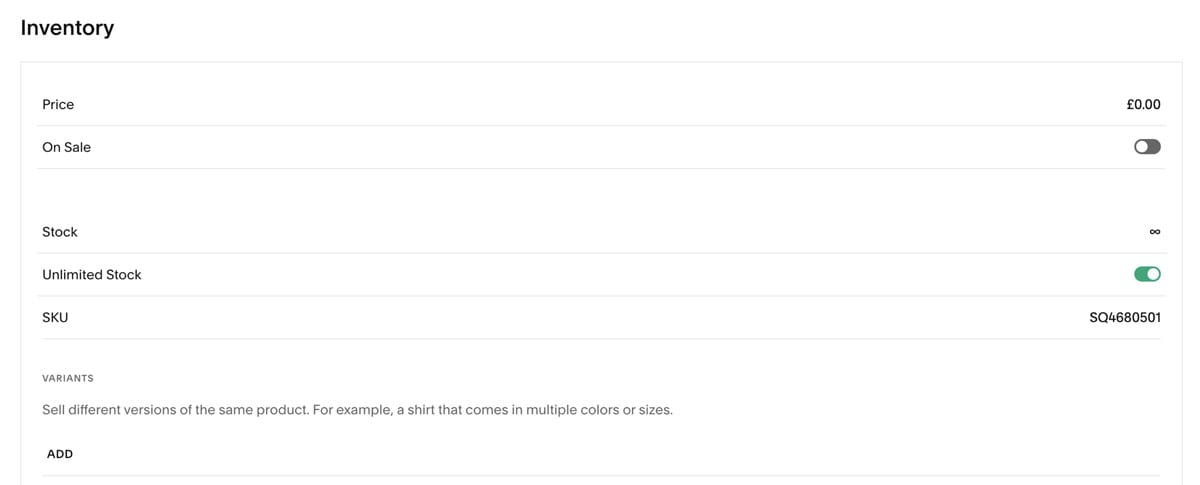
It might seem like we're skipping ahead a little, but let's take a look at variants first.
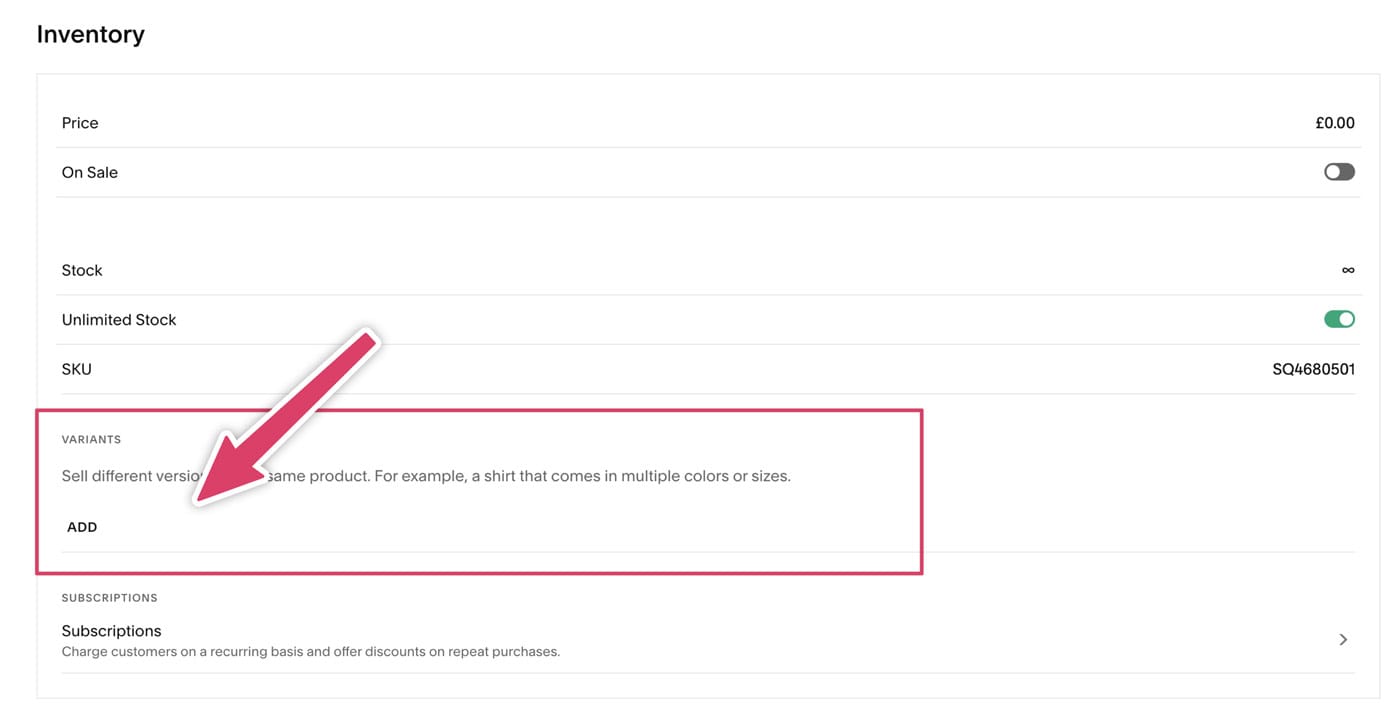
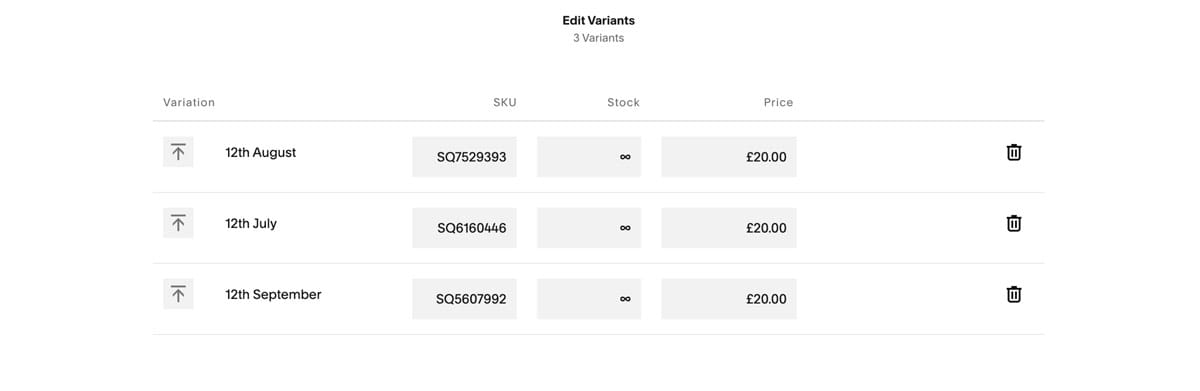
There's two ways that I see the most successful event businesses using the variants option. Either as 'ticket types' for the event: Adults, Children, VIPs etc., or as 'dates' for the event: 12th June, 12th August, 12th September etc. I recommend choosing one or the other. It's possible to do both, but tracking attendees for this gets so complicated that I don't think it's worth it.
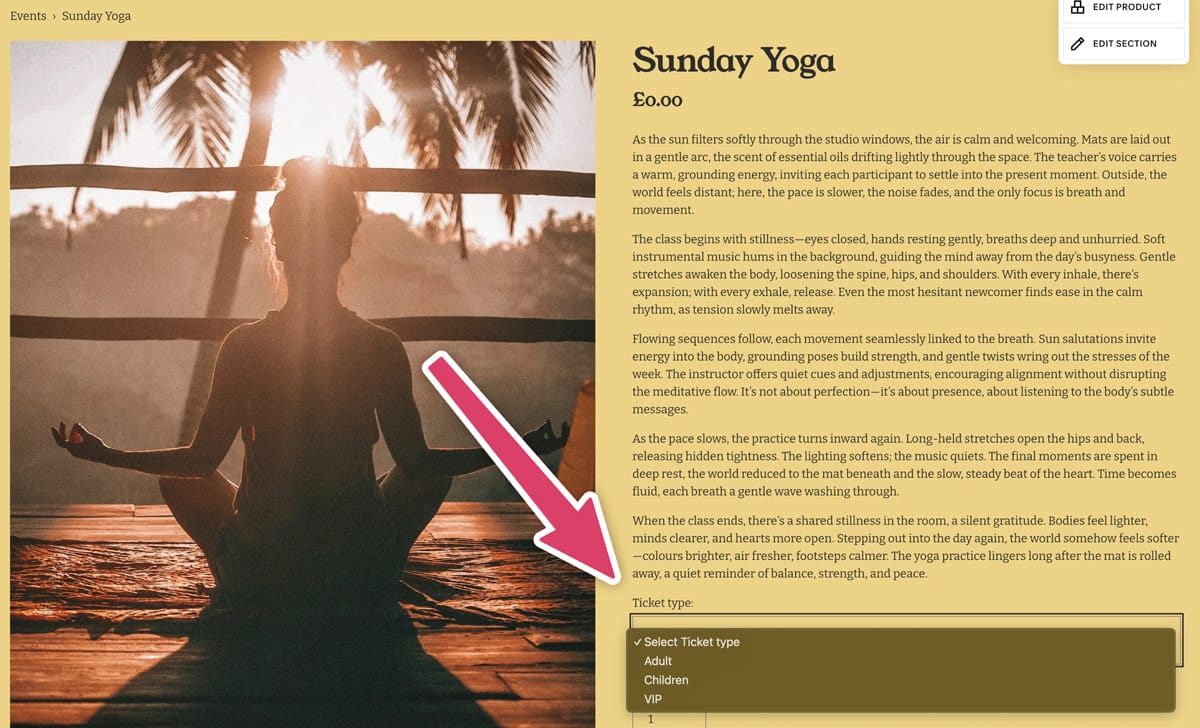
Example of using variants as ticket types:
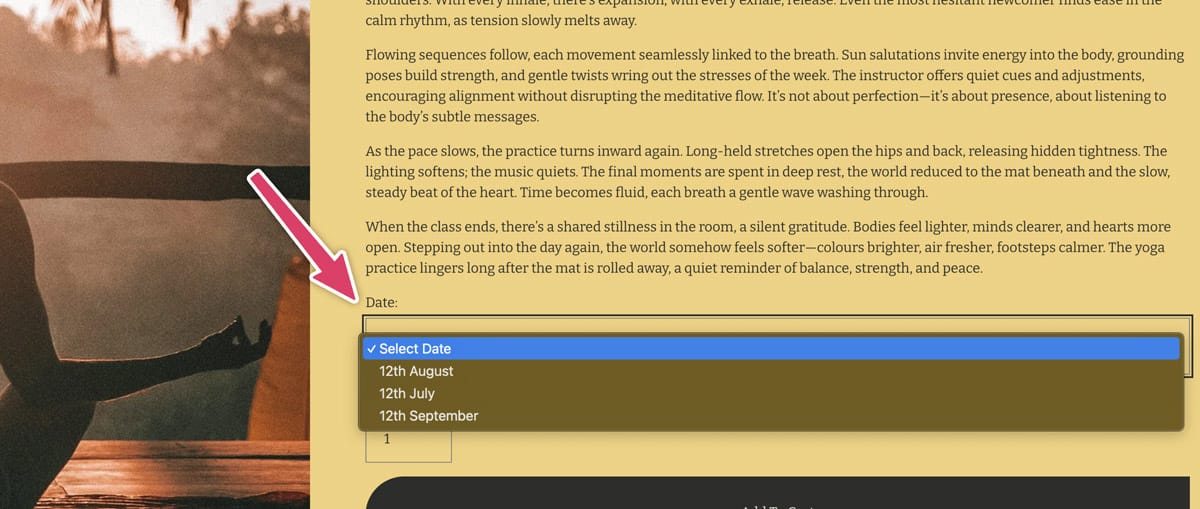
Example of using variants as dates:
There's pros and cons of each.
Pros using variants as ticket types:
- Pro - It allows different pricing and availability for different types of ticket
- Pro - Easier to see all attendees coming to the event (we'll get to this later)
Pros and cons of using variants as dates:
- Pro - Good for when you're running the same event again and again. No need to duplicate it.
- Con - It's harder to see exactly who's coming to a certain event on a certain day (again, we'll get to attendee management soon)
Now you've got your variants set up, it now makes sense to decide on the quantity available and price of each.
Categories - The other setting worth noting, especially if you're using Squarespace 7.1 is the categories section.
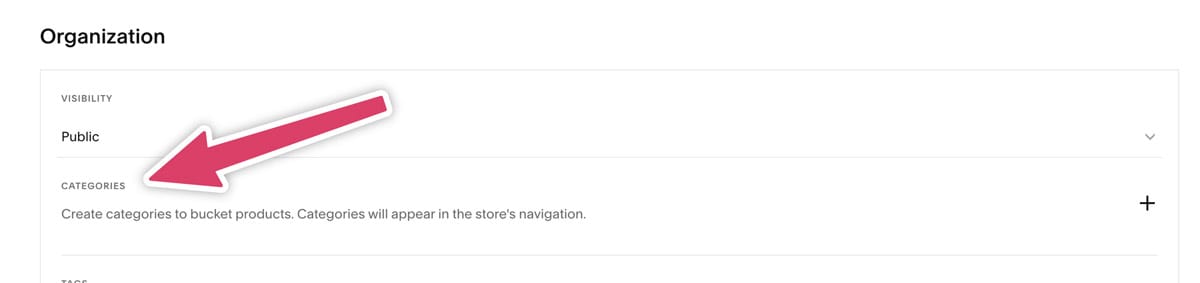
Adding categories is useful if you have lots of events because it creates a way for your attendees to filter between different types of events. For example, if you ran a yoga studio, maybe you'd have categories for different types of yoga classes you run.
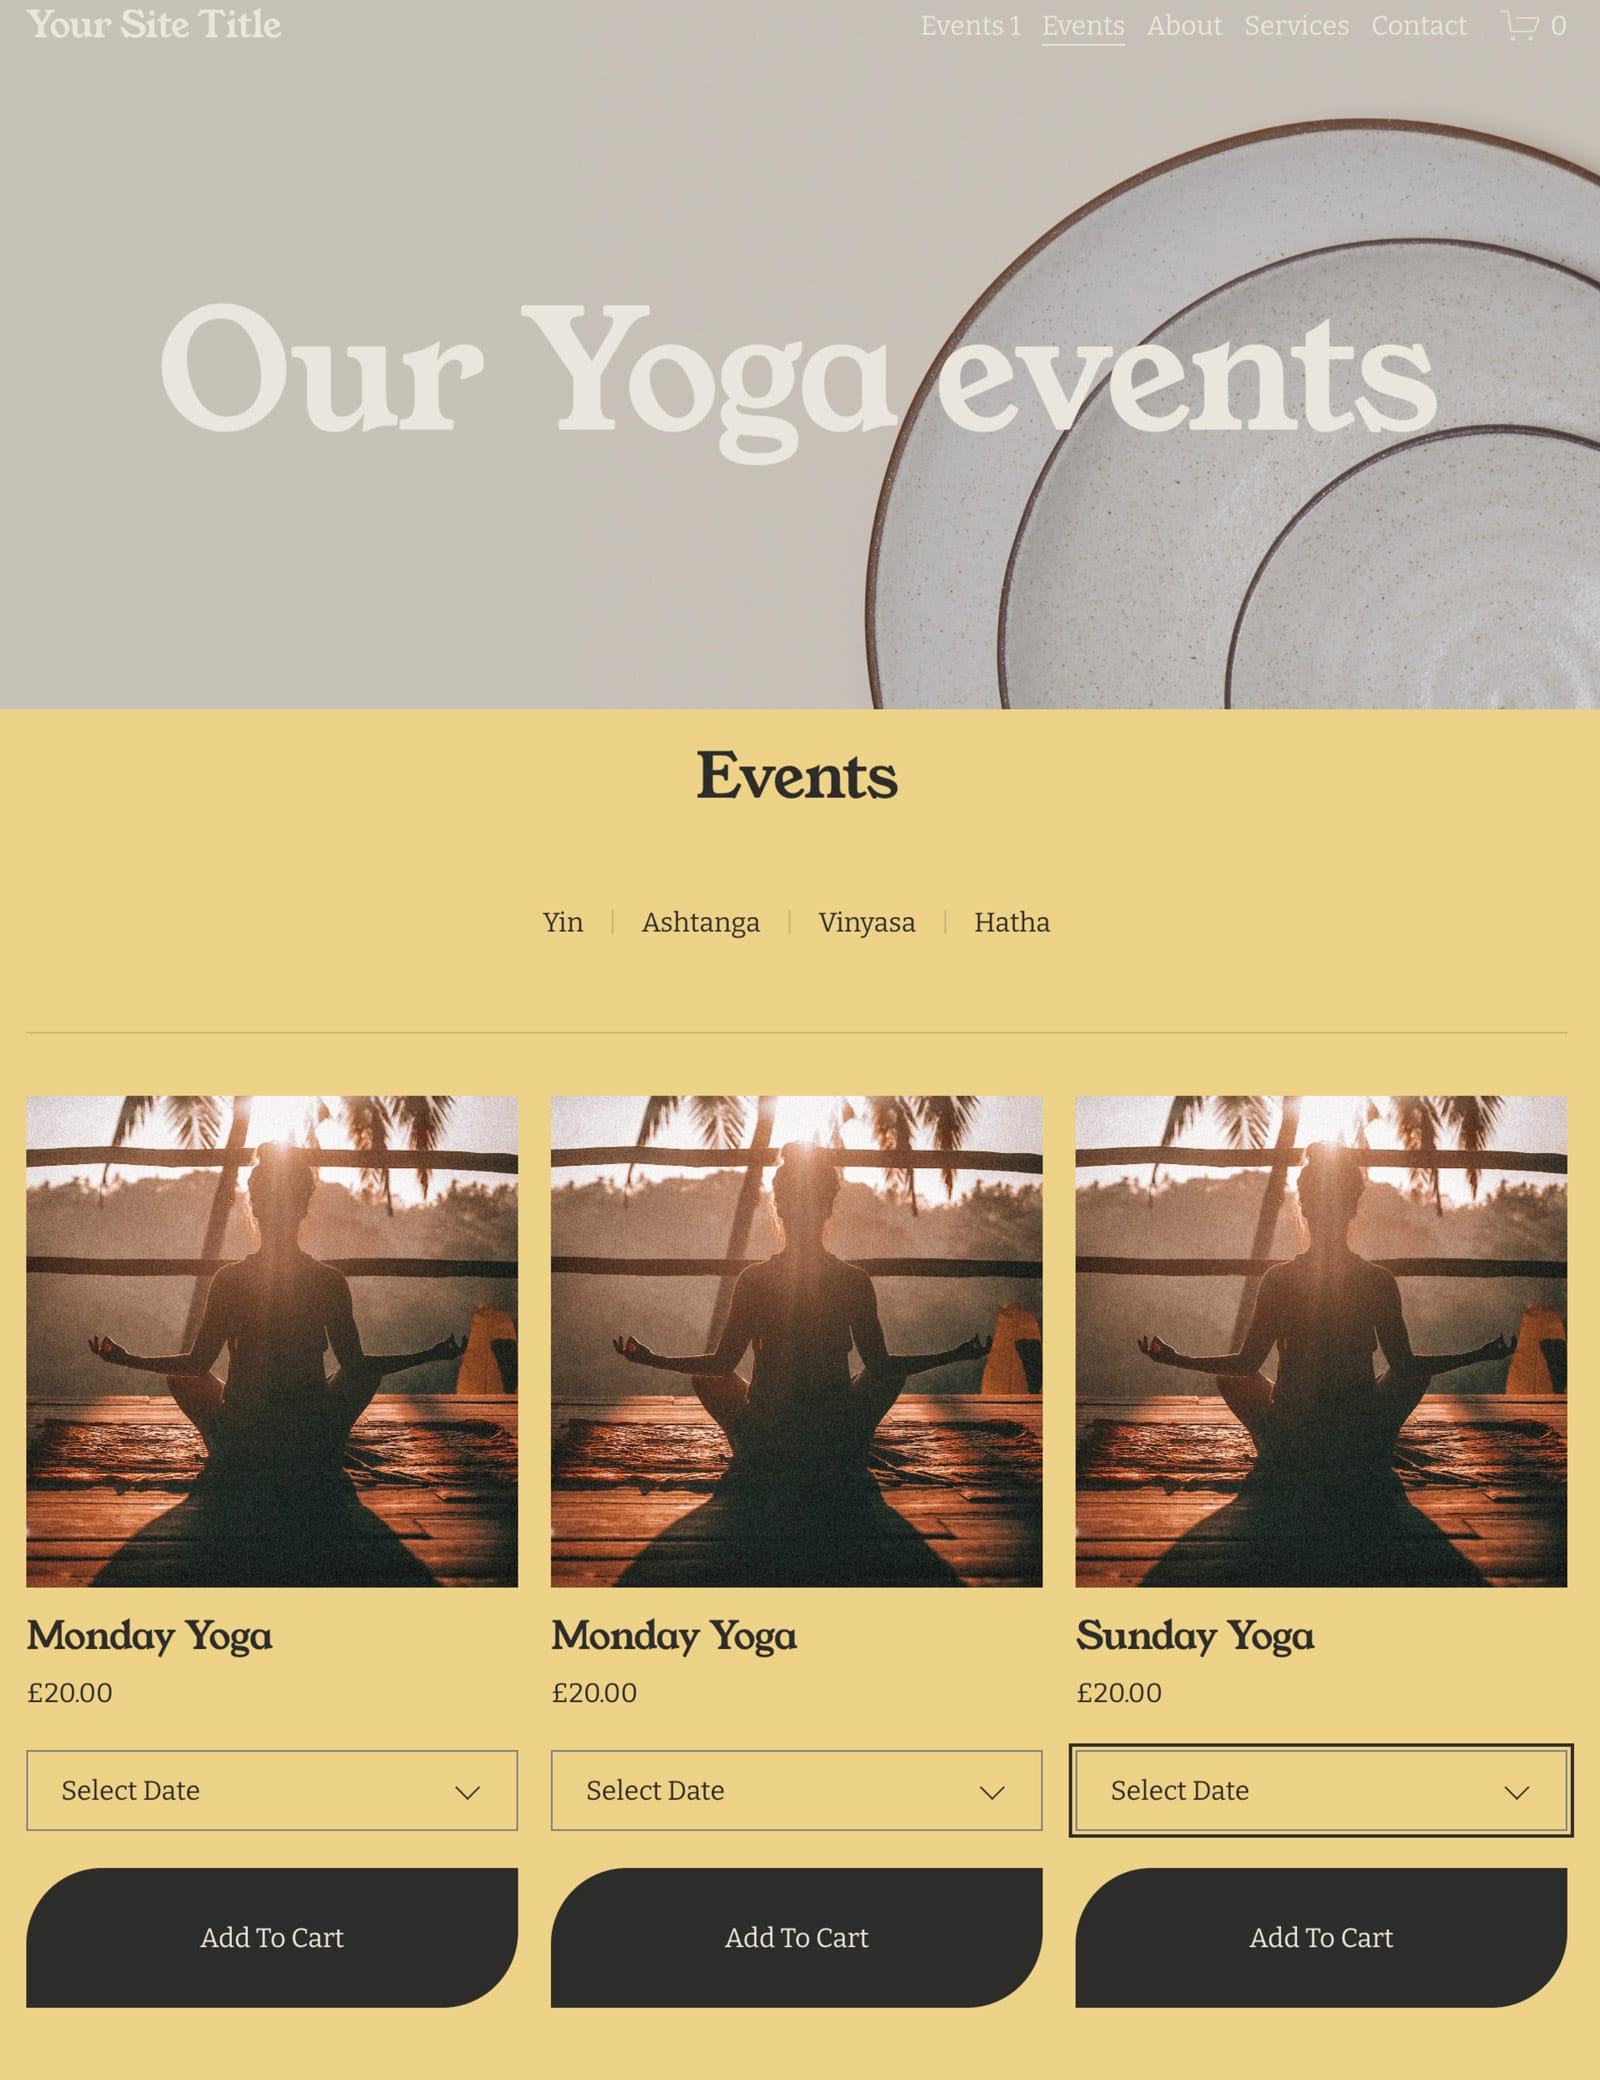
This is how categories look once you at them on your 'store'.

Each one is clickable, and allows your attendees to view only that type of events.
Now you've finished configuring your event, hit save and your event will be live on your website. That's really all there is to it.
Optional Step: Create an events page
In the Squarespace documentation they recommend also creating an 'Events' page and then creating an 'Event' for each 'Product' you create.
Why might you want to do this?
Well there's two main benefits.
- You can assign a start and end date, which creates some add to calendar links.
- You can use the Squarespace calendar block to display your events
...but with these benefits comes some massive cons.
Here's my opinion. This creates a ton more admin for you when setting these events up. Just think, for each event you create, you then need to also go and create an event and link it to the product. I tried to do this myself at one time and it soon ended up with me wanting to aggressively smash my keyboard against the screen. Ok maybe not but you know the feeling...
What I highly recommend instead is to use the 'store' you created as the way to display all your events.
Here's something I whipped up for quickly, but you get the gist.
If you're looking for extra features like the event calendar, and add to calendar links, I'd recommend using a third party application instead.
But, if you want to give this a go feel free to follow the official Squarespace documentation on this. Prepare for faff.
Attendee management with Squarespace Commerce
So now you've set up your events, and your attendees have begun to buy tickets, what now? How do you actually keep track of who's coming and who's purchased tickets? Will they receive any emails?
Let me talk you though it...
So once someone purchases an event, they'll receive an email that looks like this:
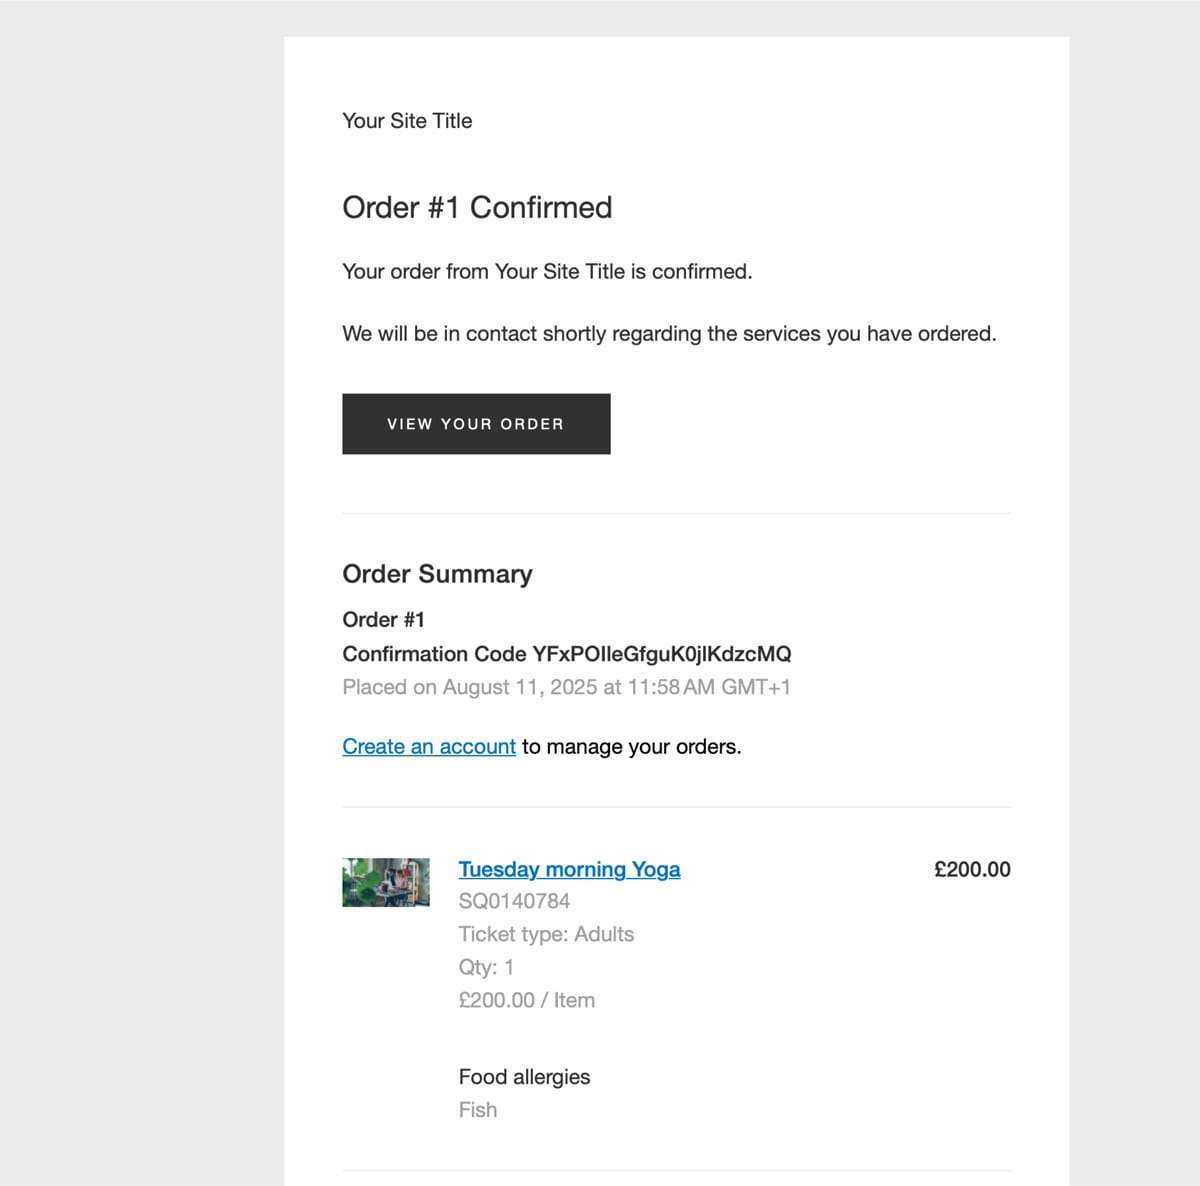
You'll also receive a similar email confirming the order.
However, the main way to see who's coming to your event is to head to your orders page.
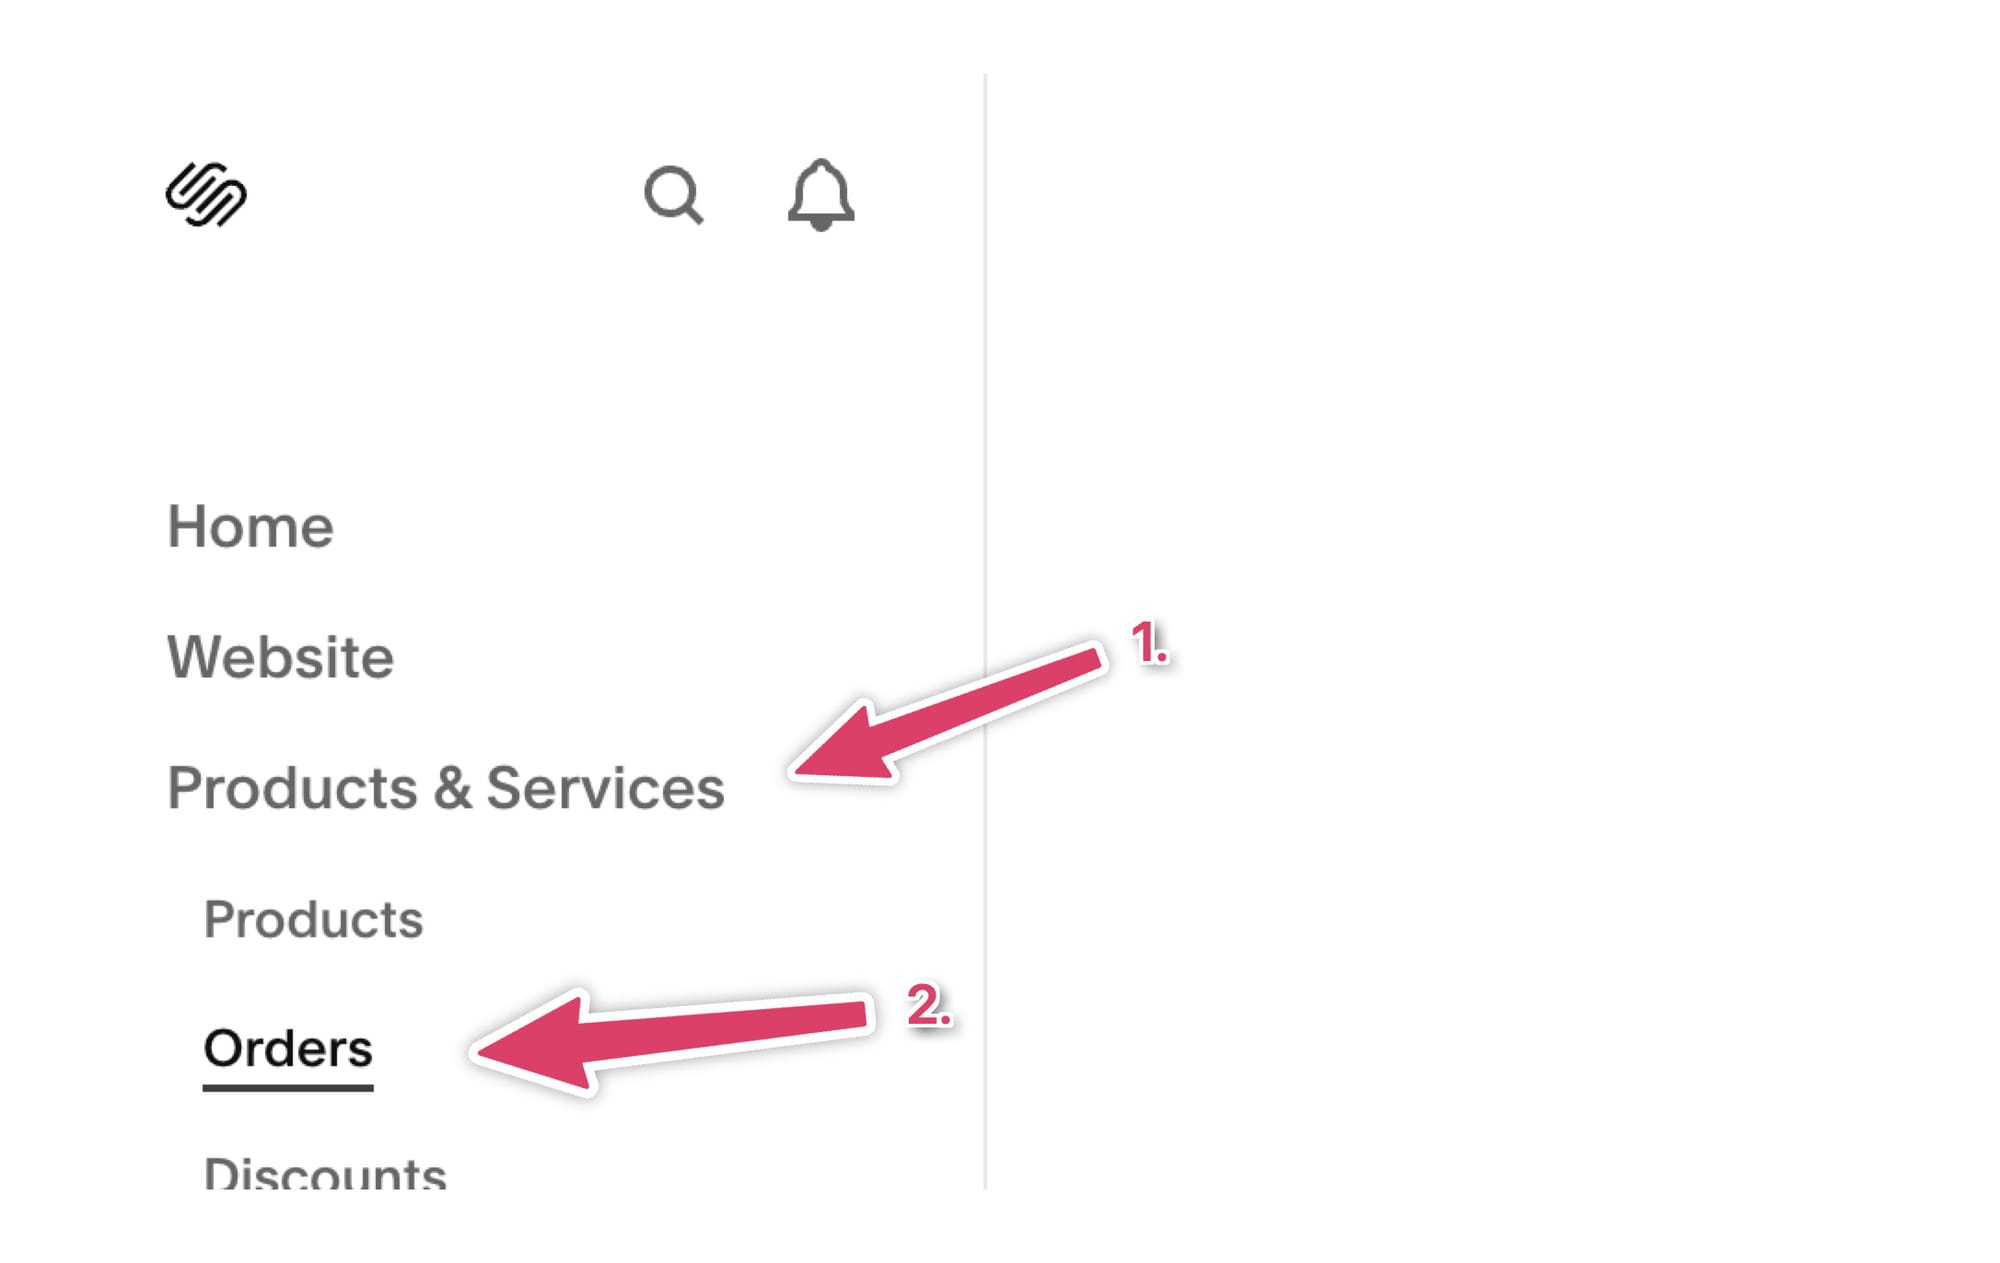
And from there you'll be able to search for the name of the event, and then see who's coming.
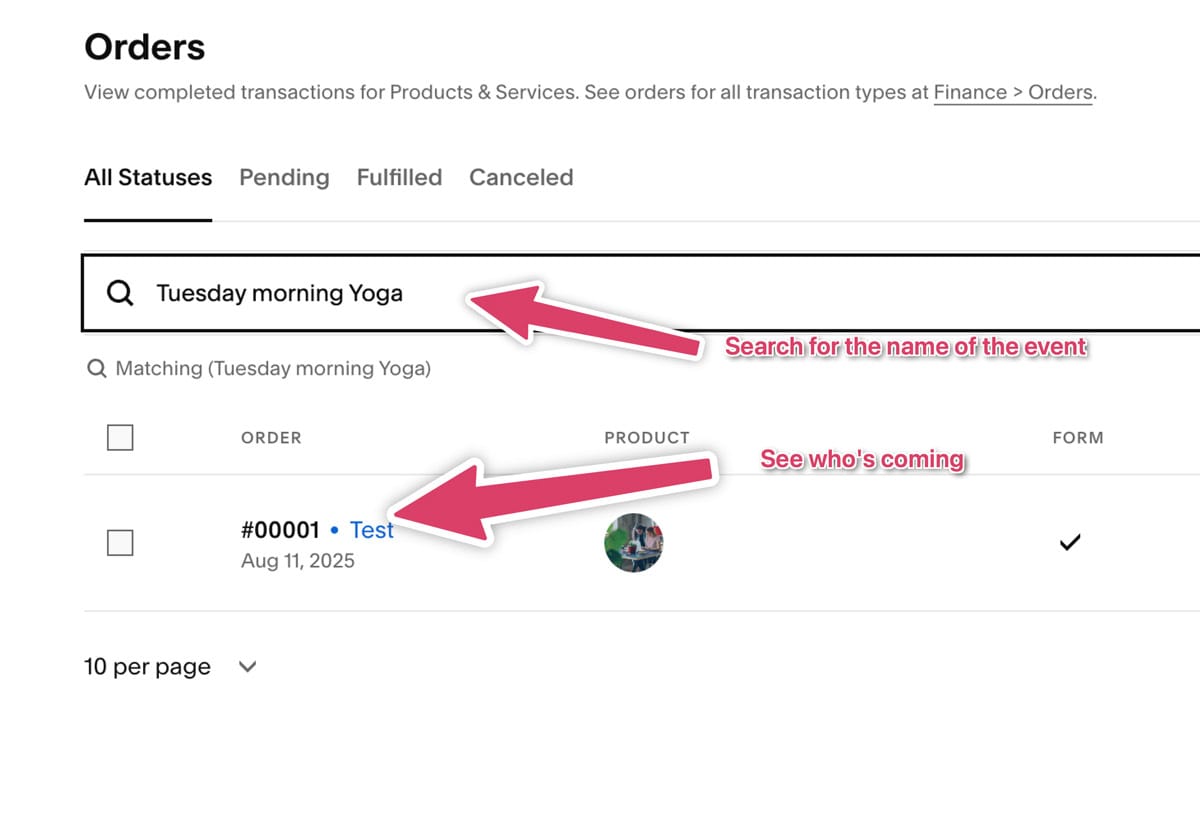
That's really all there is to it.
Event registration with Squarespace commerce
Not all events cost money. Maybe you want a way to collect registrations for your event to allow people to reserve spaces and you can see who's coming?
Event registration with Squarespace commerce is as easy as setting the product to a cost of zero. Once you do this, your attendee will still have to 'check-out' the product - that is they'll go through the checkout process and place an 'order', but it won't actually cost them anything.
Summary of using Squarespace commerce for ticketing
Hopefully this walk through gives you an idea of how the in-built Squarespace tools can work for selling event tickets.
As you may have noticed, it's extremely basic. Squarespace was never built for selling tickets, and in reality they built Squarespace Commerce for selling 'products' and 'services', not events.
So, if you're serious about your events, maybe you're looking for something else...
Option B: Using a ticketing platform to sell tickets on Squarespace
There's a number of different ticketing platforms you can use, but the problem is that most don't embed on your website. Or if they do it's an after thought and in reality you'll be sending your attendees away most the time. And we want to avoid that remember...
In this example I'll be using Event Calendar App as the ticketing platform (yep I bet you saw that coming...). However, if you decided to embed a different ticketing platform the steps would be similar.
Here at Event Calendar App we built the only ticketing platform that is literally built from the ground up to be part of your website. This means you get all the integration of Squarespace commerce but with all the extra benefits you need to run a great events business:
- A platform built for events - As an event organiser, you want to use something that's built for you, and your job. Not wrestle with an existing system that isn't even meant for events.
- Simple attendee management - See exactly who's coming to each of your events, without trawling through Squarespace 'orders'.
- Recurring events - Easily setup recurring events. Squarespace famously has no support for this. For example if your pottery class runs once a week, there's no need to create a new product for every single event.
- Event Subscriptions - Let customers subscribe to your events, so they can see any future events you are selling tickets to.
- Search - Allow your customers to search for events.
- Automated emails - Improve your attendees' experience with timely automated messages before and after the event.
Let's get started
Register for an account on Event Calendar App and add some of your events. You will be at a screen that looks like this:
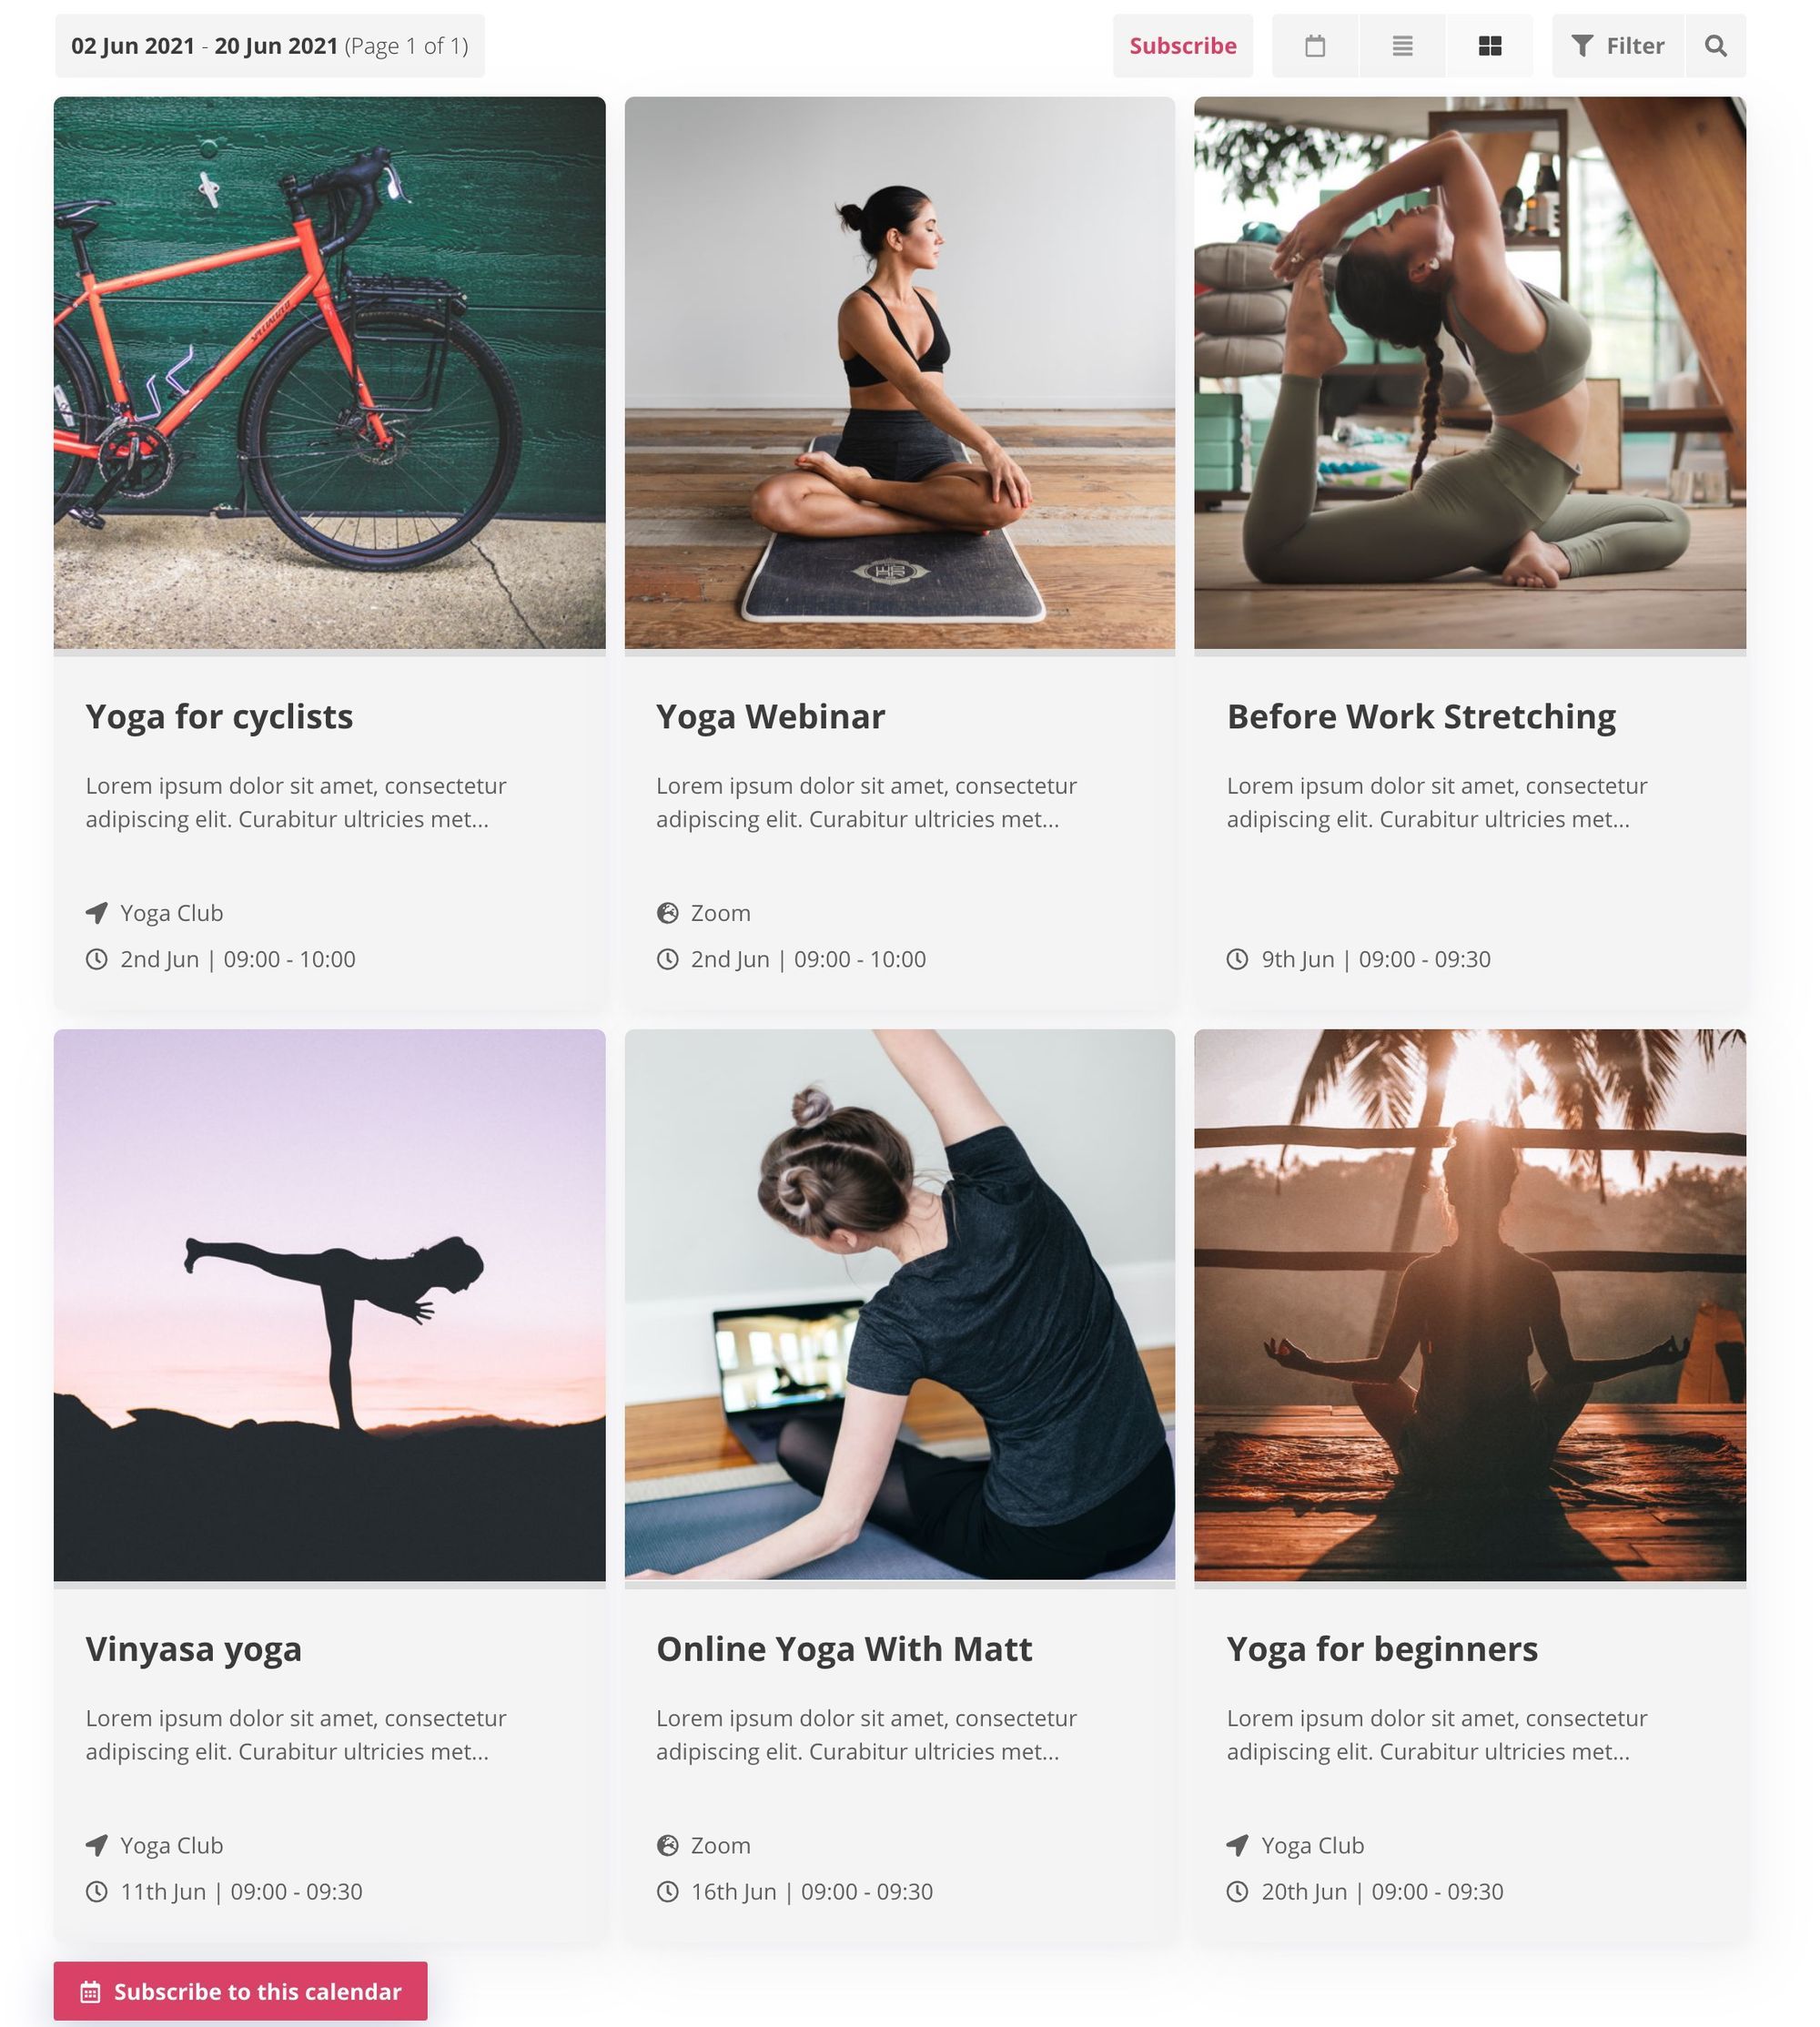
Keep adding as many events as you like. I'll be adding some events for a pretend yoga studio.
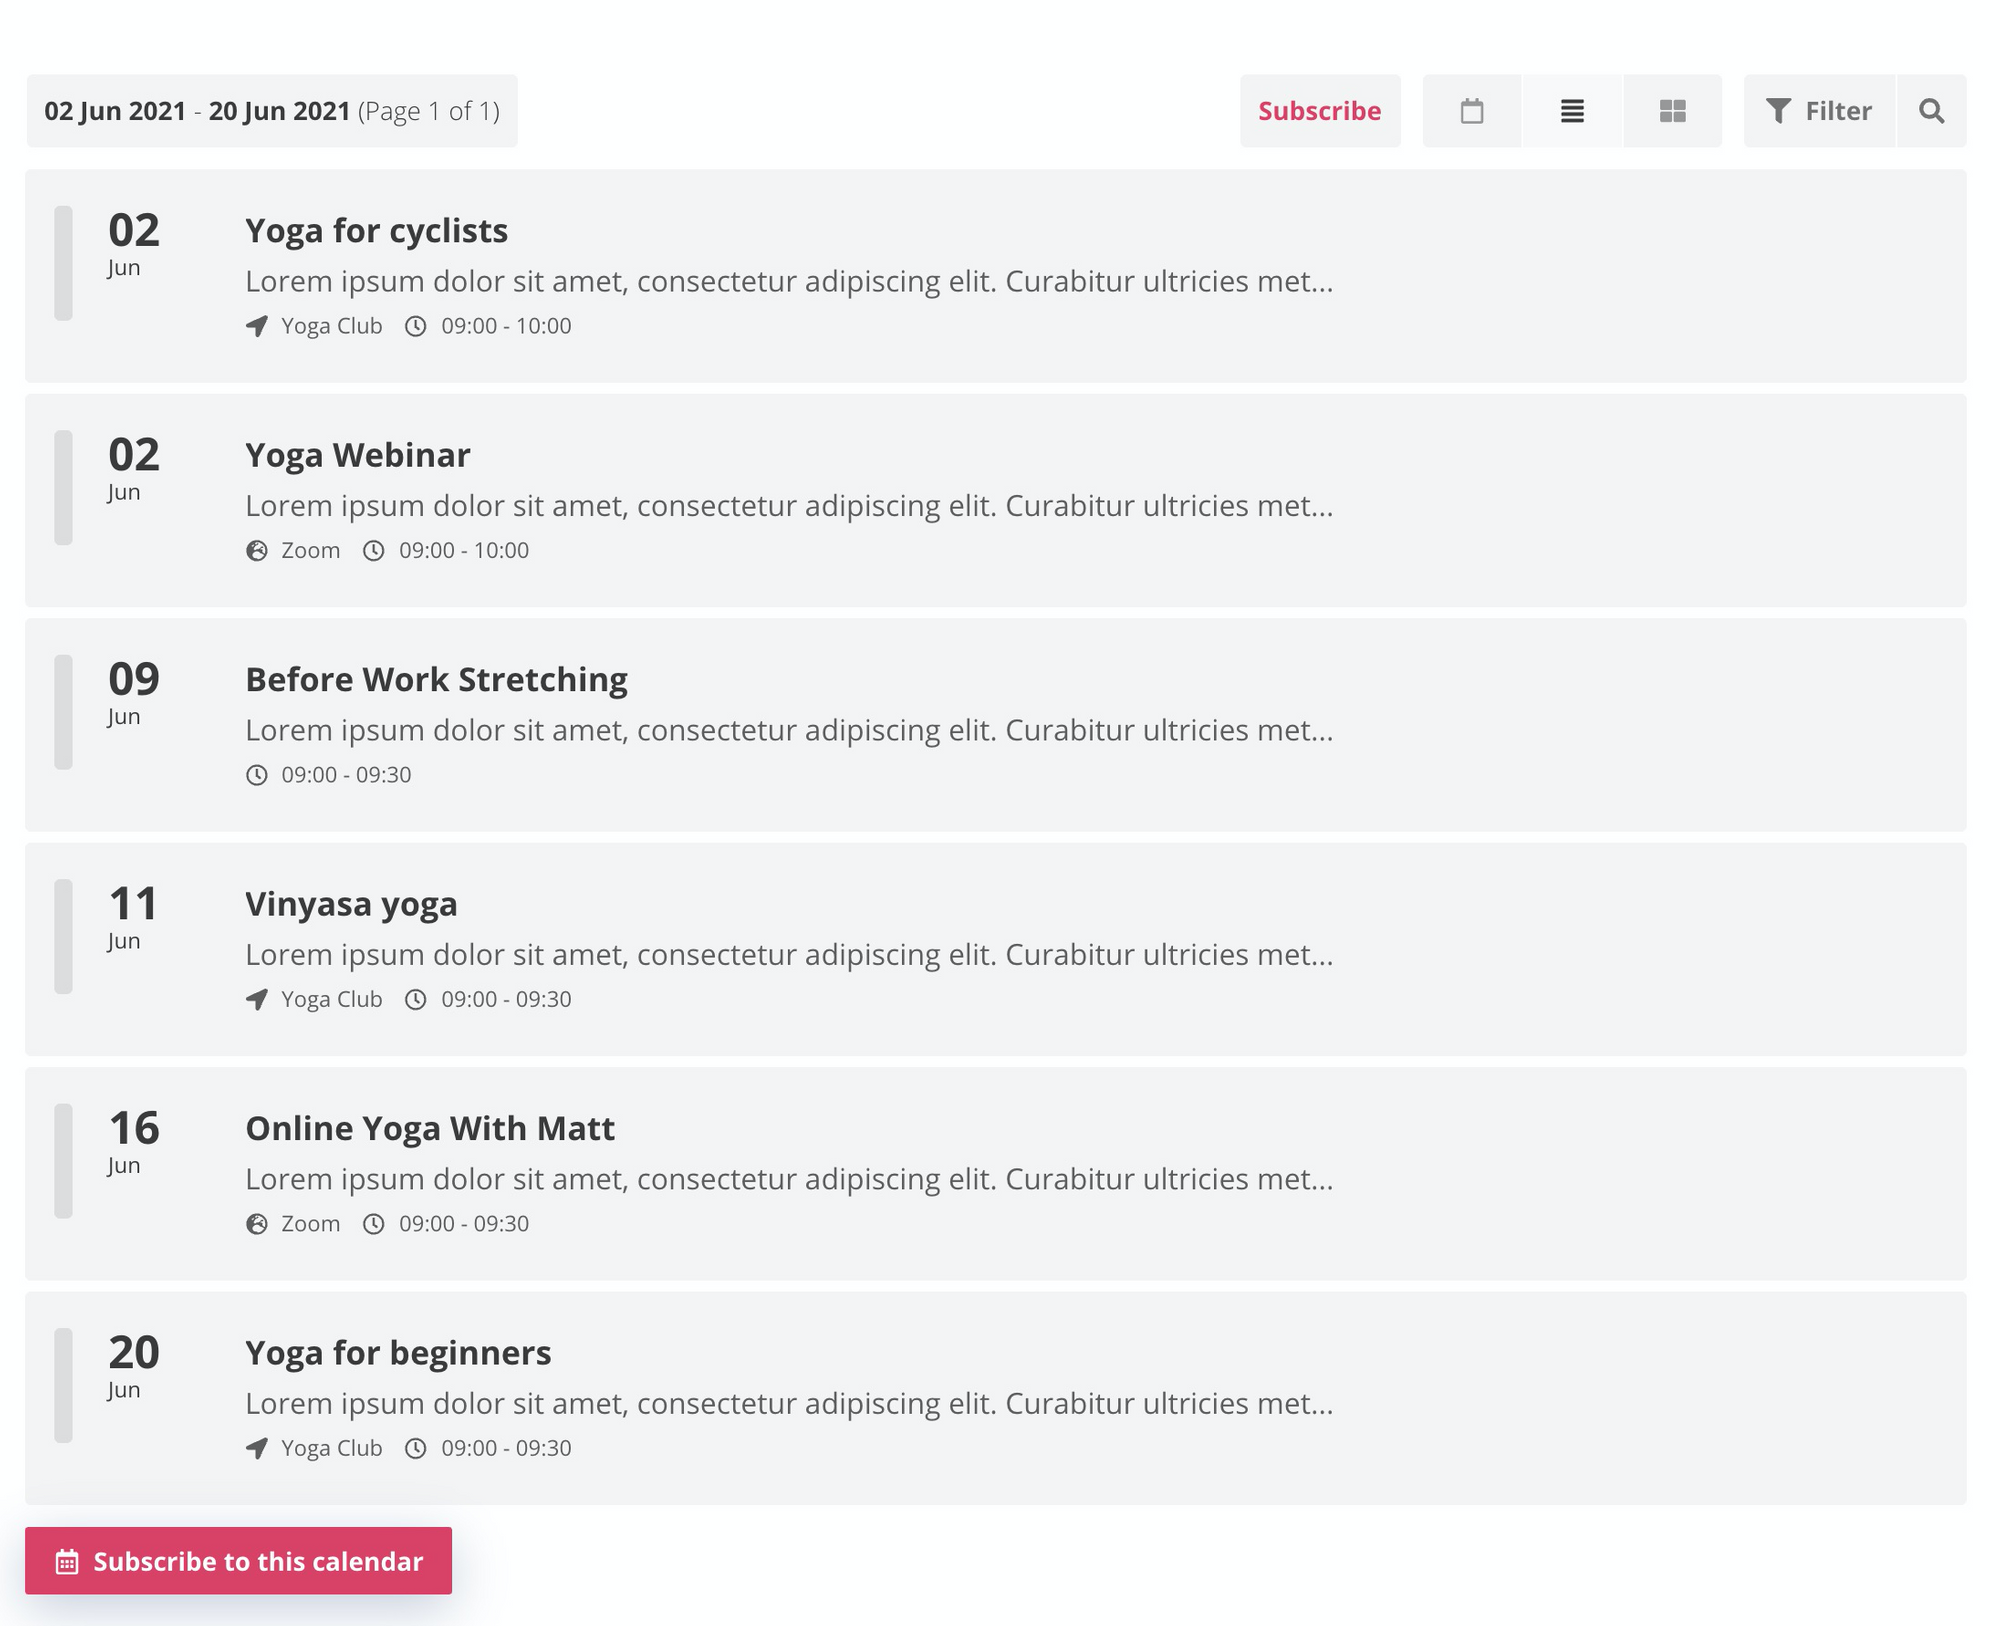
Nice. We can already see some pretty big improvements over the Squarespace calendar. There are options for the customer to subscribe, there's search, and the customer can choose to view the events in different ways. I'm a big fan of the grid view, which after adding some images looks like this:
Setting up tickets
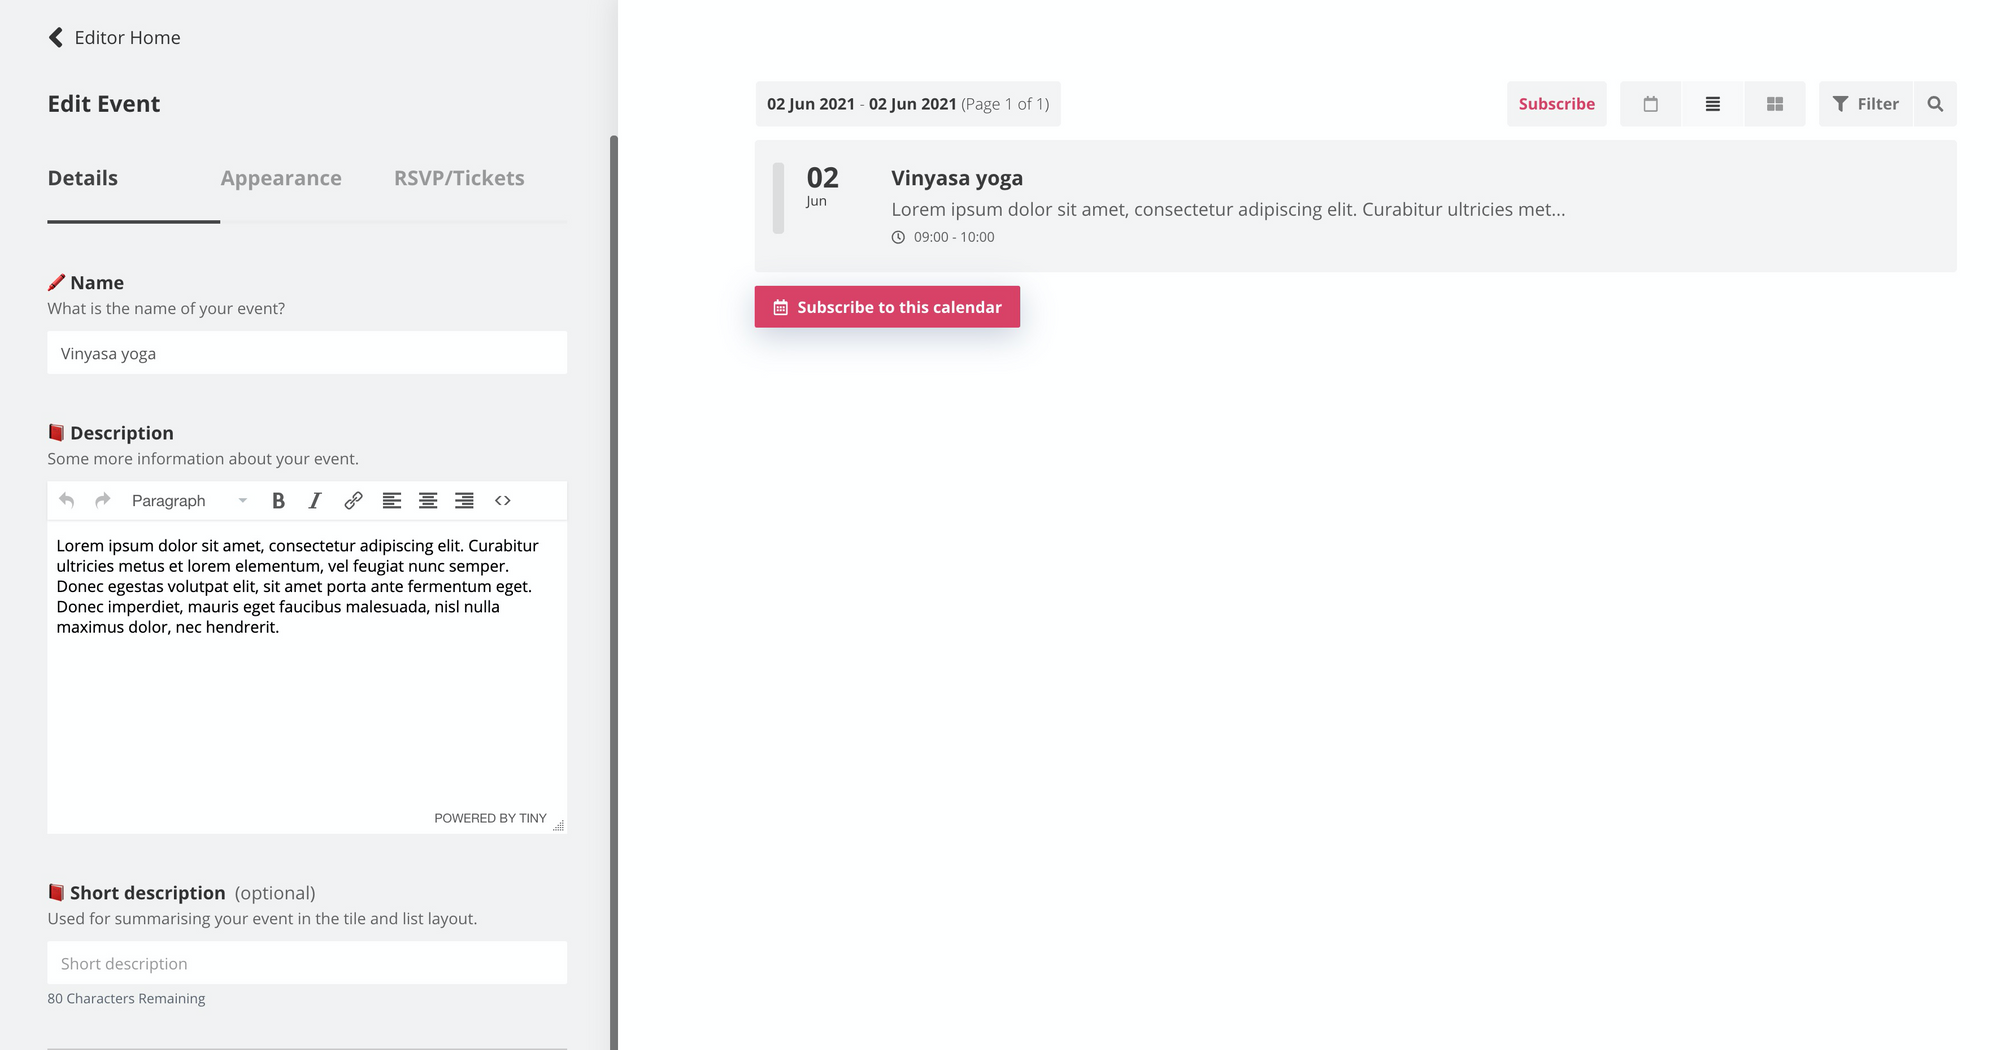
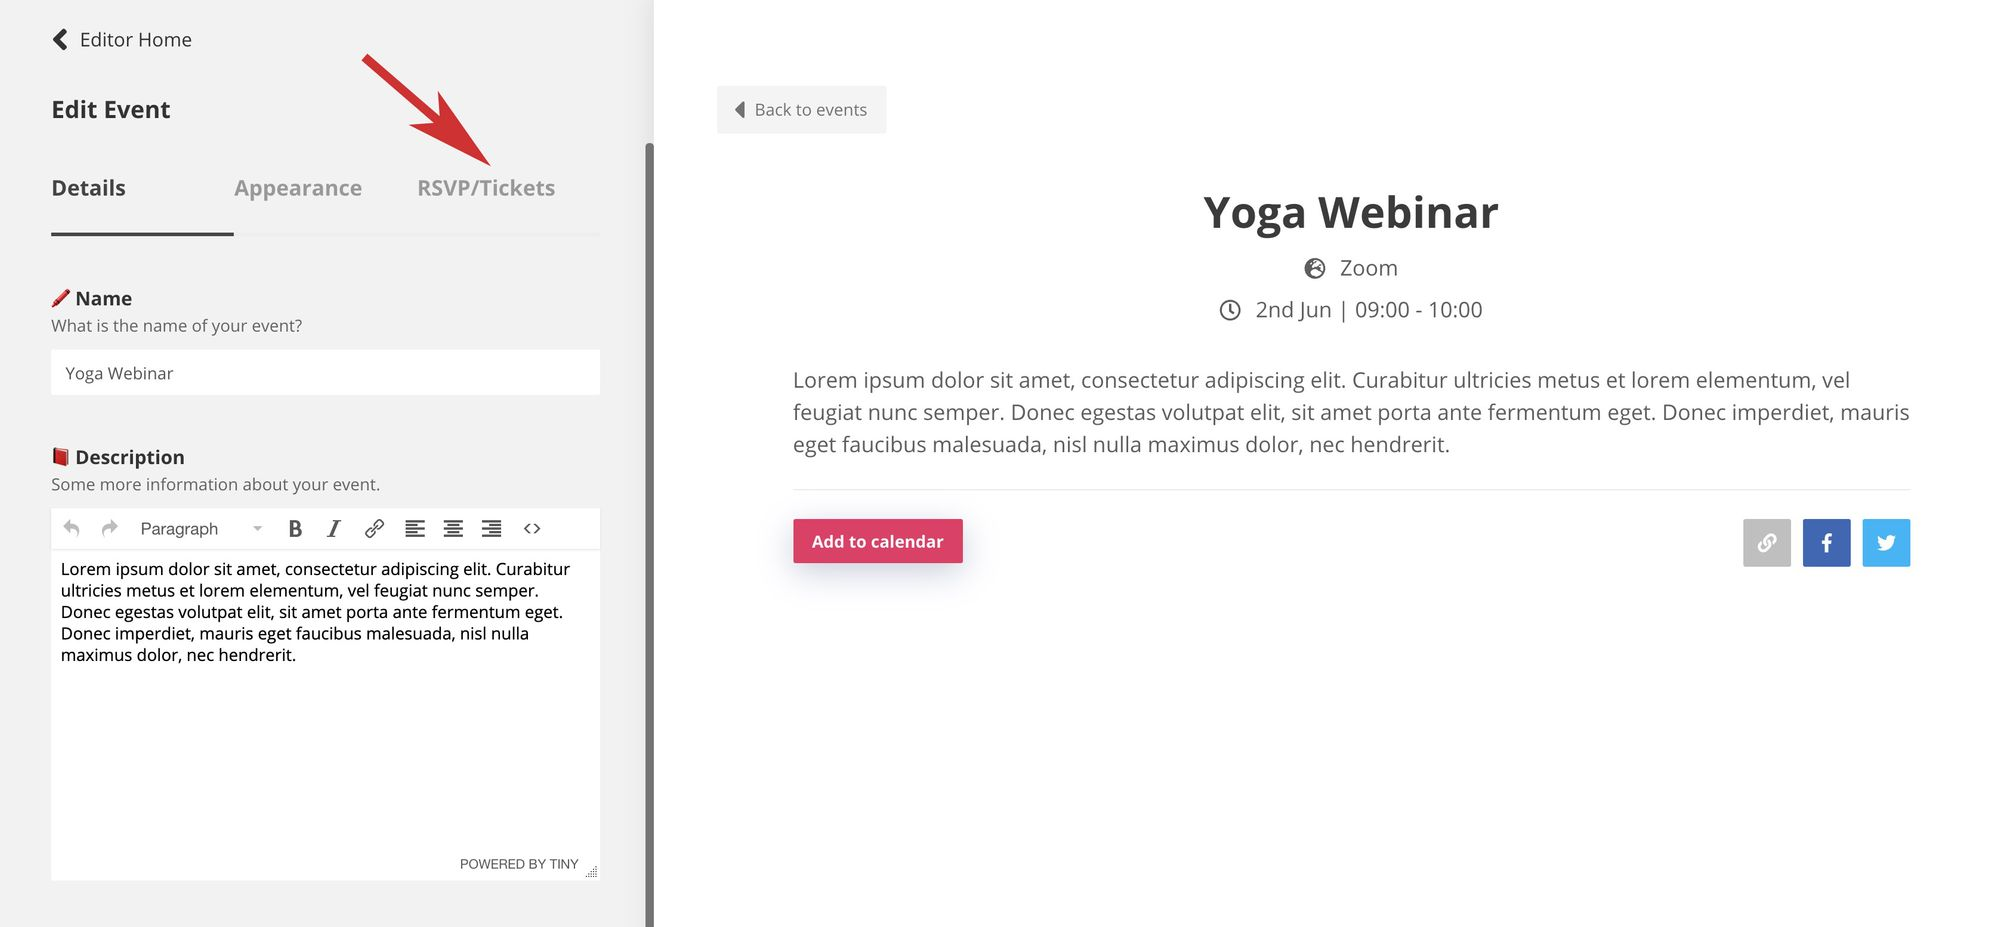
What we need to do now is add ticket options to the events. Event Calendar App makes this very easy and editing events is as simple as clicking on them and using the options panel on the left to make changes. In this case, choose an event, and click on the RSVP/Tickets tab on the left.
In here we can see all the options for collecting RSVPs and charging for events. In this case we want to charge for this Yoga webinar.
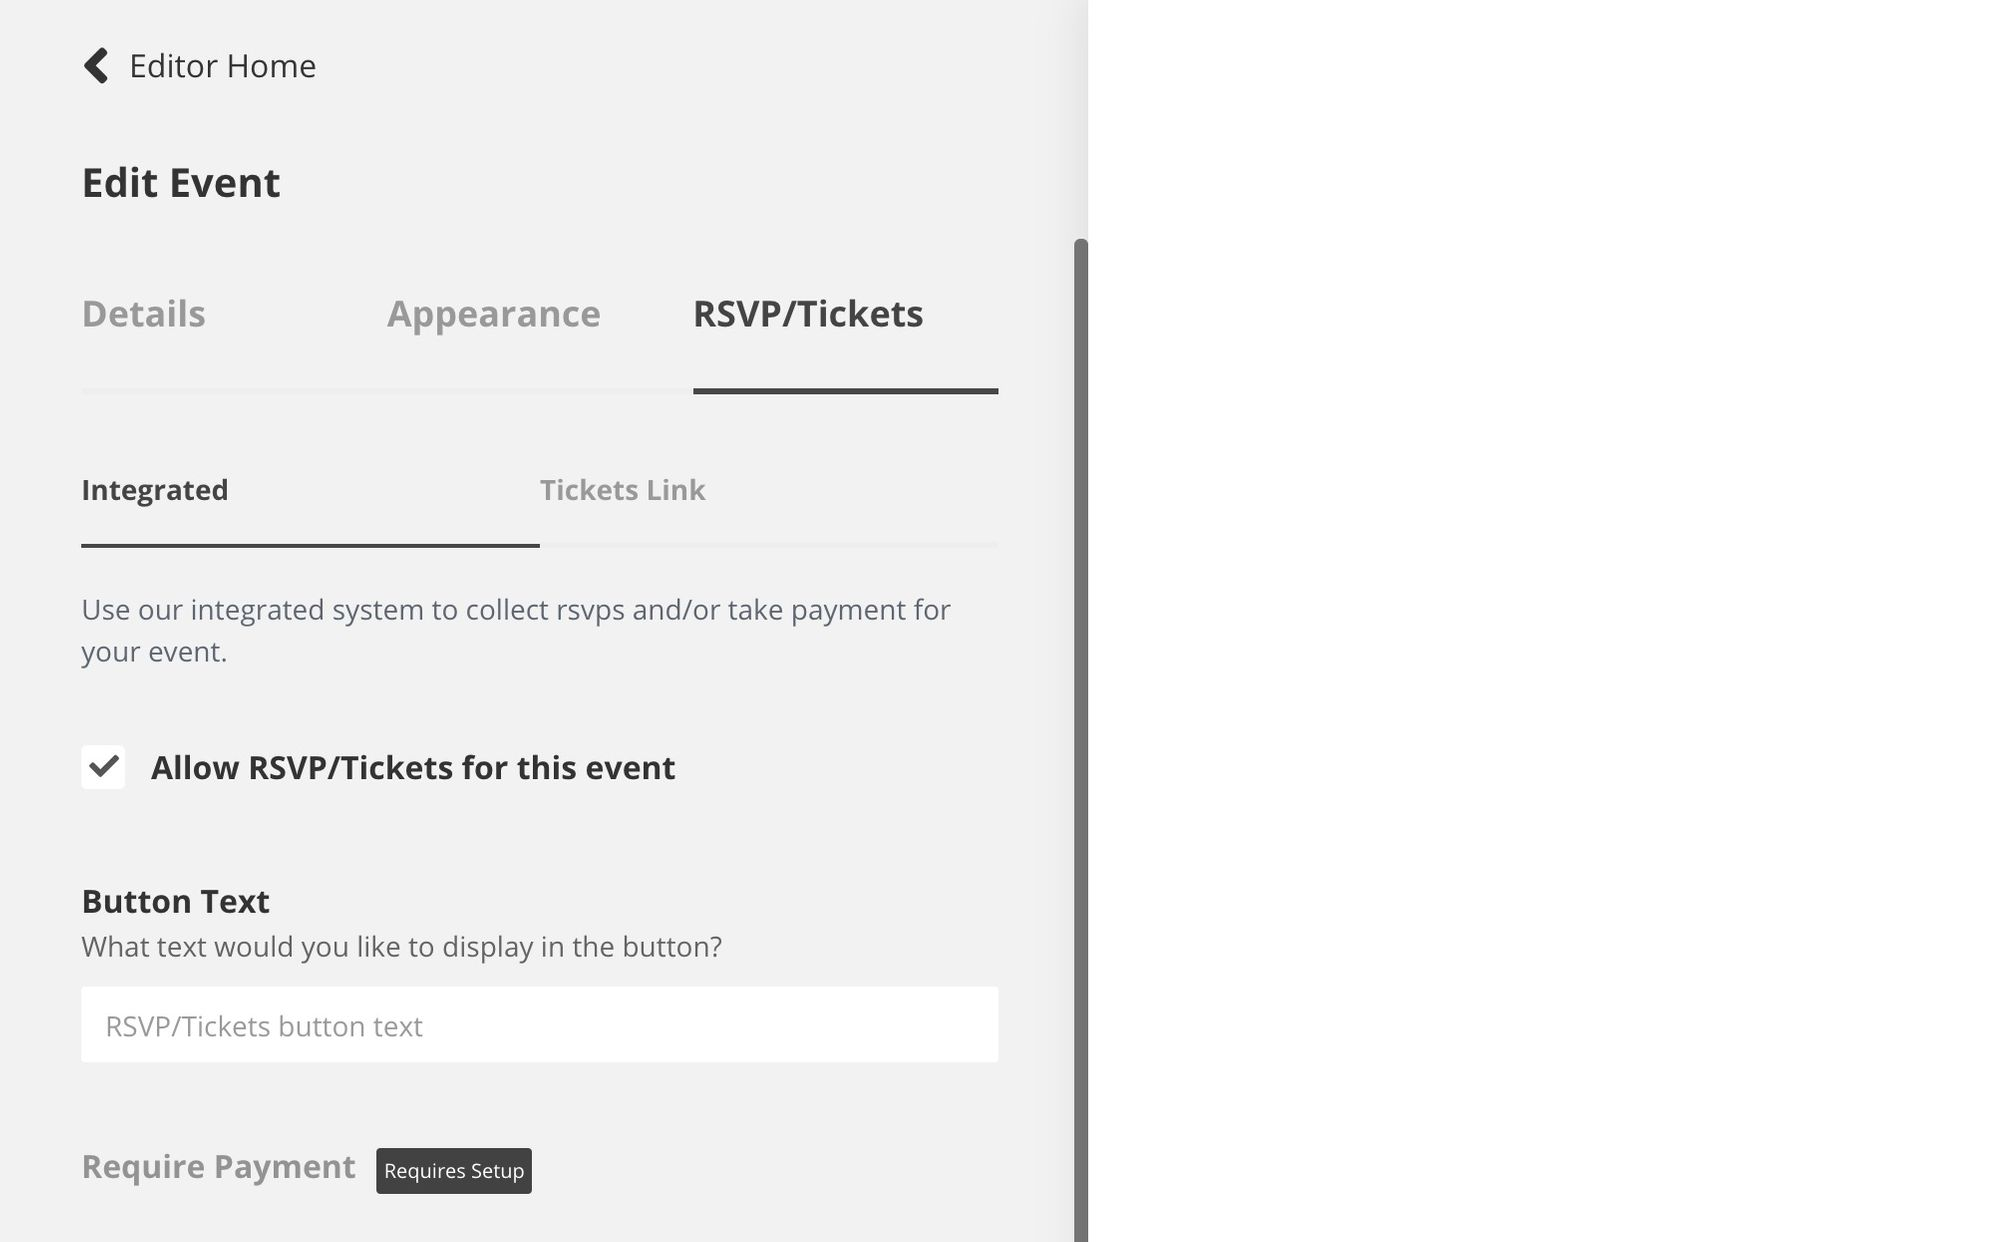
You'll see that requiring payment means we need to set up Stripe. Stripe is the payment provider that will handle all of the payments. Their fees are exceptionally low, and it means that as a business you never have to deal with credit cards, or any sensitive payment information. Ideal.
We have full written instructions on how to set up Stripe here https://support.eventcalendarapp.com/en/articles/2774901-complete-guide-to-selling-tickets-and-taking-payment-in-event-calendar-app
Once Stripe is set up correctly you should be able to click on the Require Payment field:
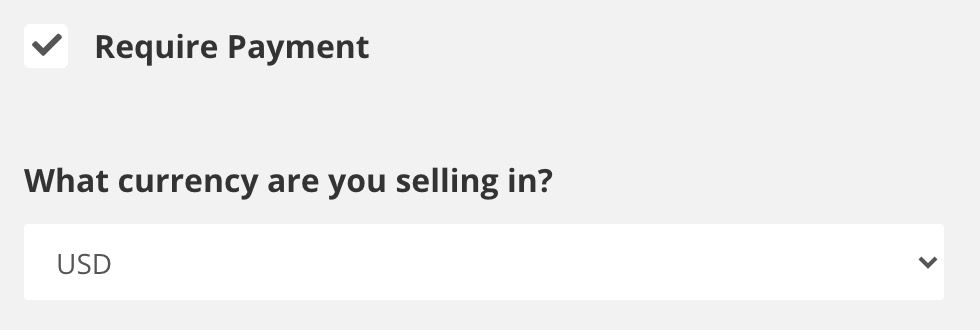
Be sure to also check that you change the option to the correct currency that you will be selling in.
An important configurable option is the RSVP form fields section:
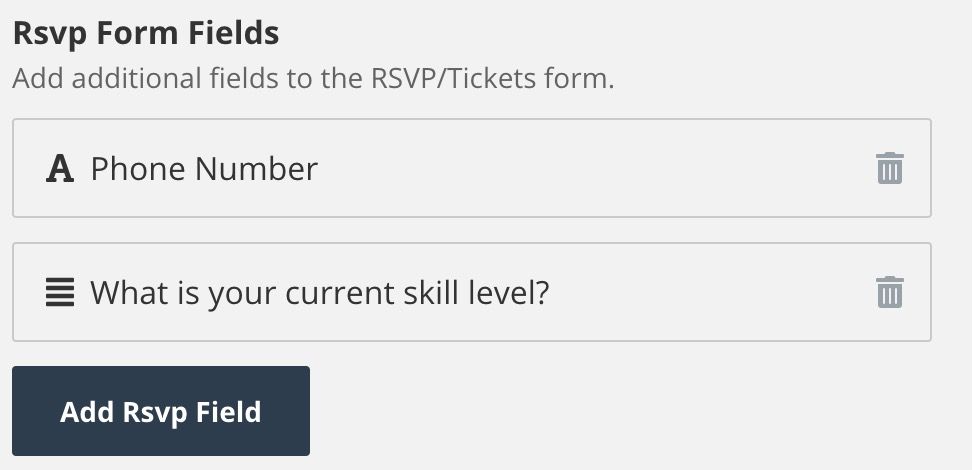
This allows you to add any additional fields to the checkout form.
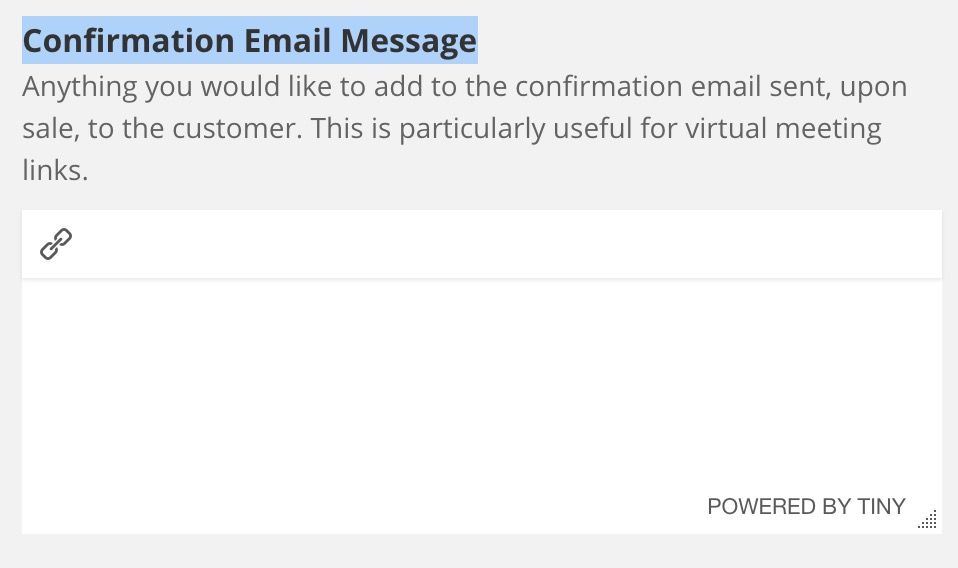
Another option we find that is used a lot is the Confirmation Email Message. This is particularly useful for virtual events because there is often a link (whether in teams, zoom, or whatever other software you use) that you only want to give to those who have paid. This is the place to put it.
Event registration with Event Calendar App
Event registration (events that cost nothing to attend) works much better with Event Calendar App then with Squarespace Commerce. The attendee doesn't need to go through a checkout process, and instead simply clicks on the event, types in their details and clicks 'complete'. It couldn't be simpler for your attendees.
Add Event Calendar App to Squarespace
How you add your Event Calendar to Squarespace depends on which template version you are using. Version 7.0 or version 7.1.
How to add Event Calendar App to Squarespace 7.1:
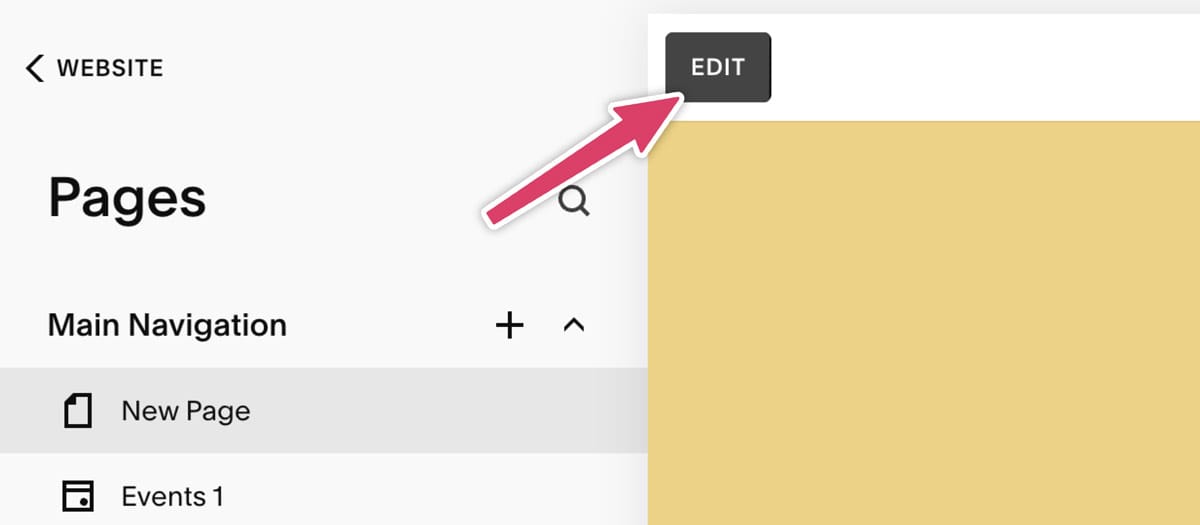
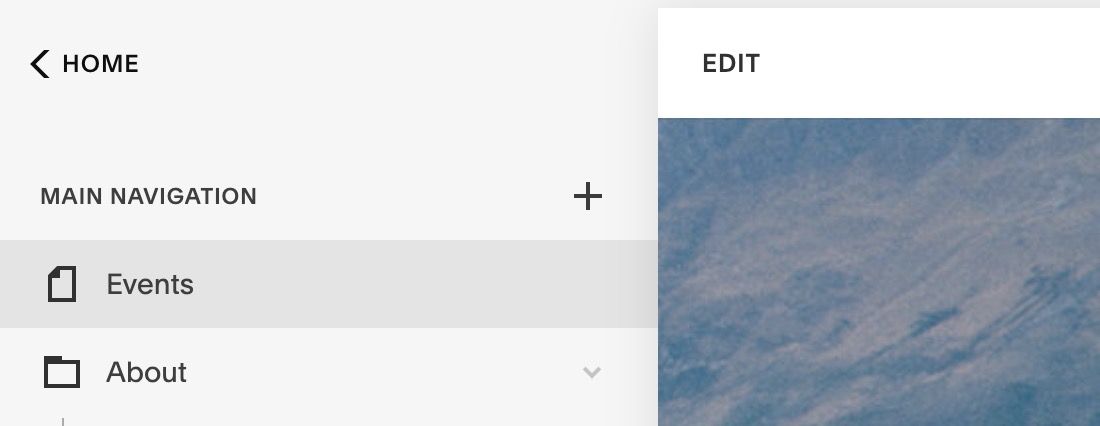
- Using the Pages tab on the left, browse to the page you would like to sell your events on. I personally like to create a dedicated events page. To do this click the + icon next to Main Navigation and then choose Blank Page.

2. Click the Edit button on the top left.
Now, I will admit this next part is slightly confusing. Squarespace is all about adding 'sections', however it's only possible to add a code element inside of a section. That means we need to:
- Create a blank section
- Add a code element inside of that section
- Then click 'Add Section'.
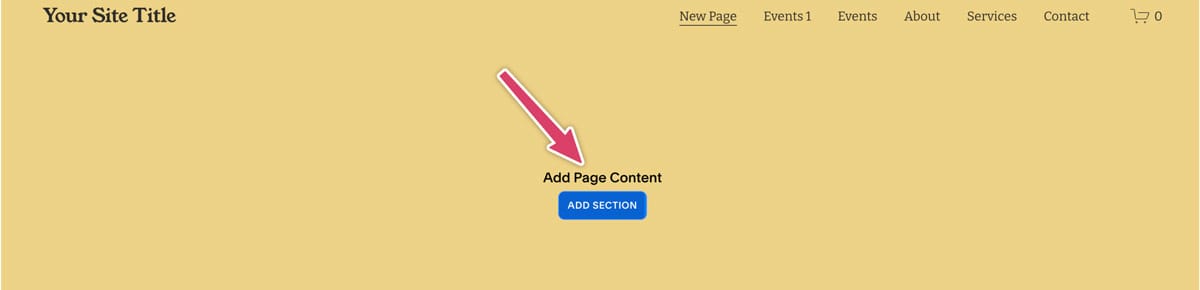
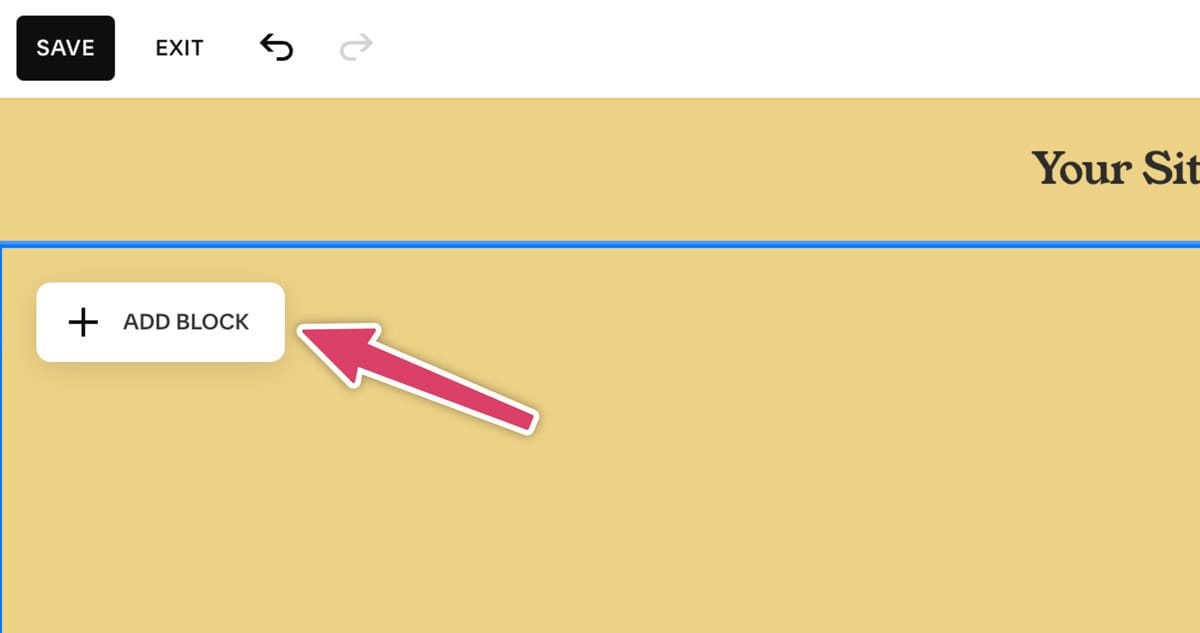
- Click Add blank section
- You should then have the ability to add a block within that section
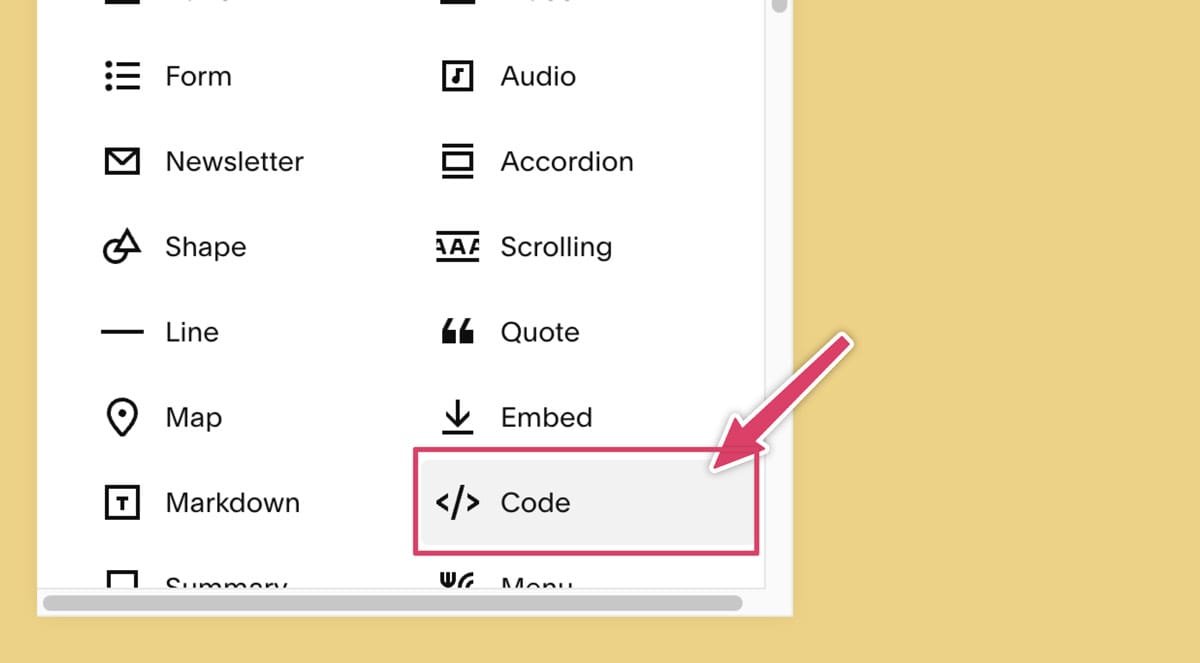
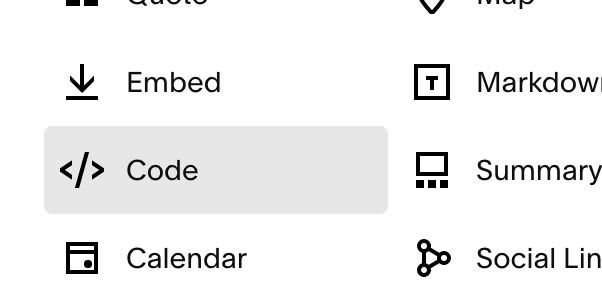
- Scroll down and click where it says code.
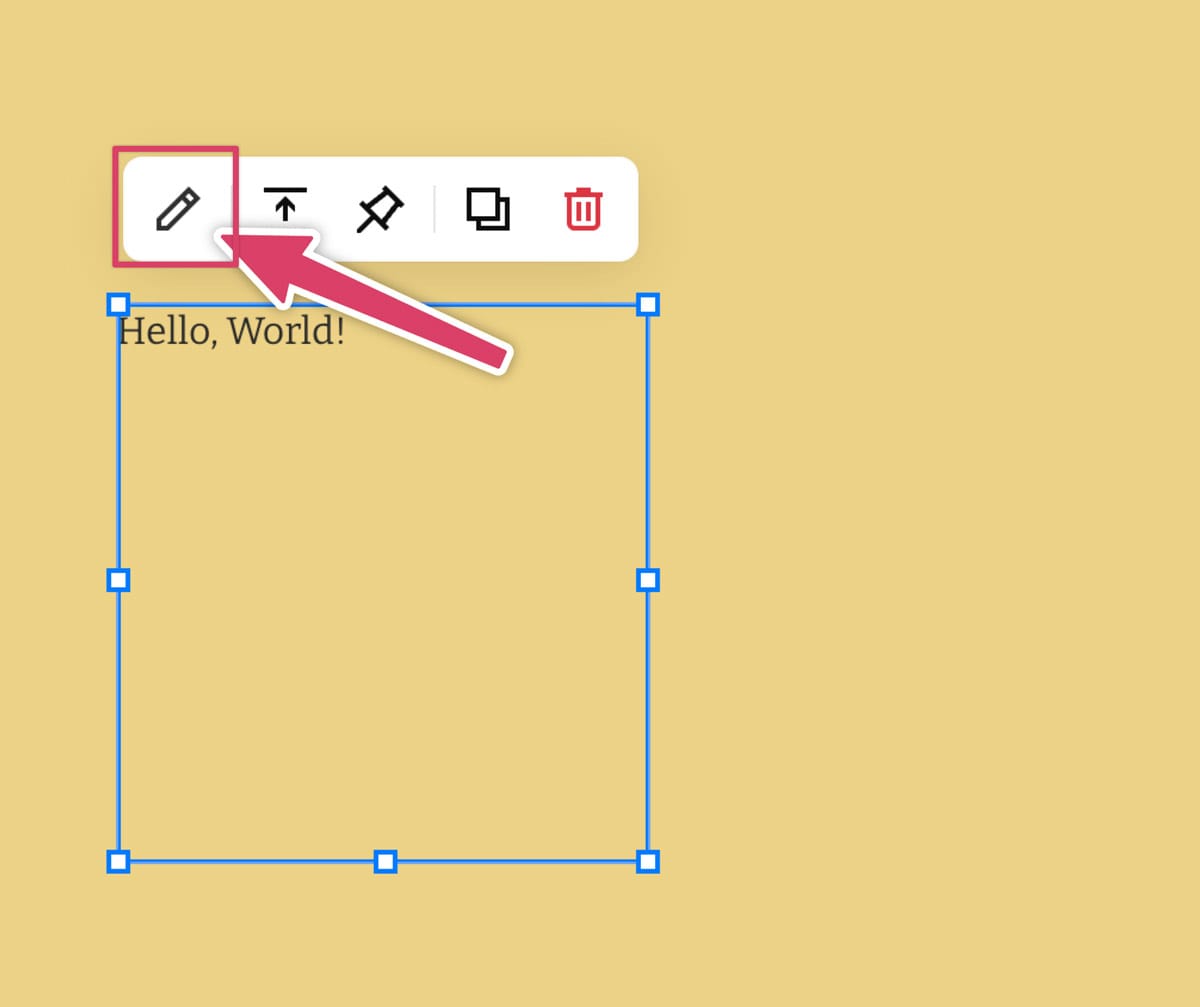
- The code block will then be added to your page. We want to then click the edit button.
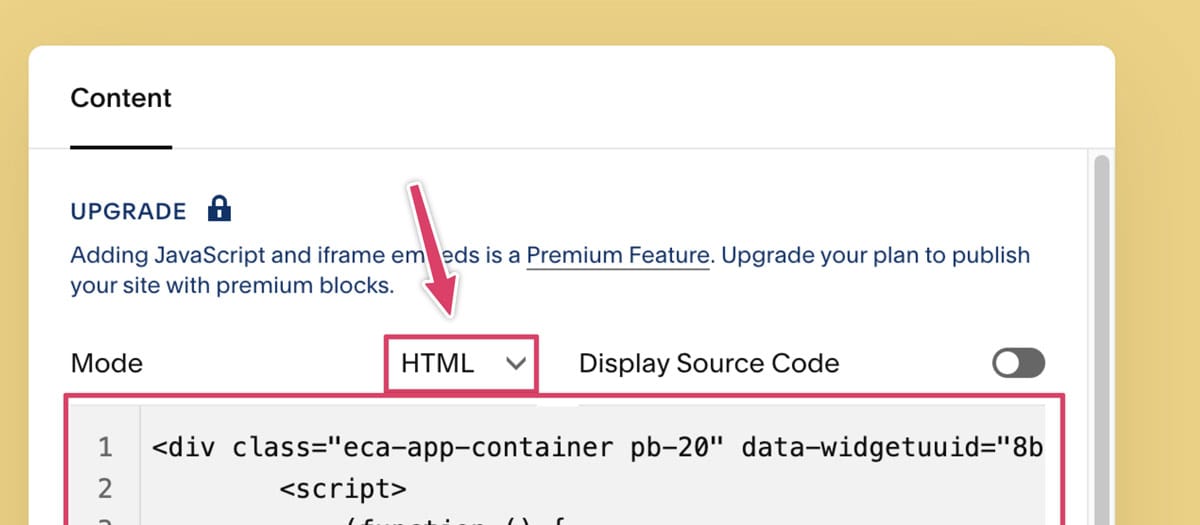
- This is where we're going to paste your Event Calendar App embed code. Make sure HTML is selected in the mode.
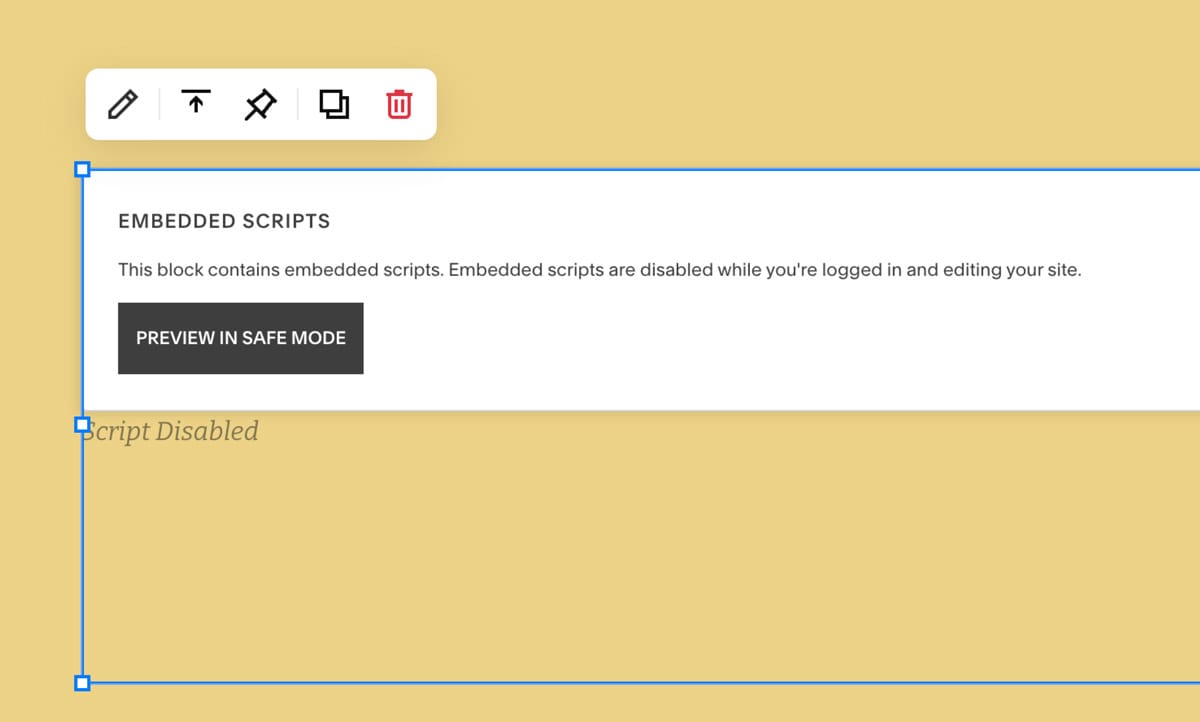
- My default, Squarespace creates embeds in a very small space. Go ahead and drag this to expand it to the width of your site. It's not clear but don't worry about the height, this will correct itself automatically.
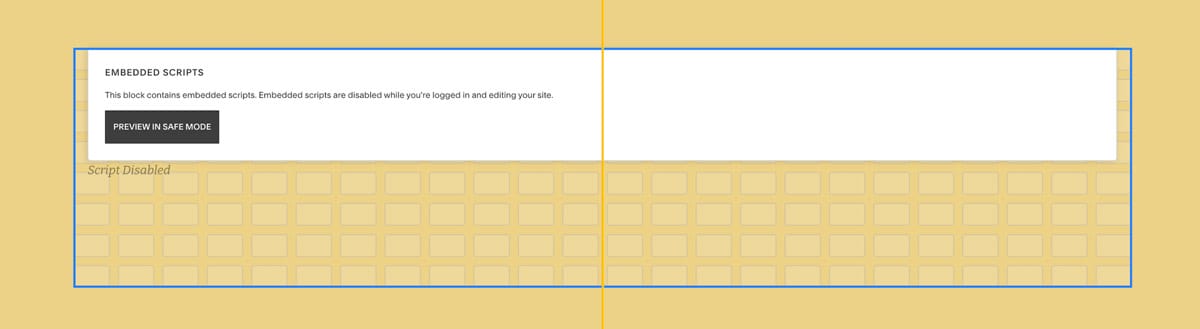
Unfortunately embeds don't work while you're in editor mode. But don't worry, as soon as you click save everything will pop into place.
Click save in the top left corner and then exit.
All done!
How to add Event Calendar App to Squarespace 7.0:
Adding third party widgets to Squarespace 7.0 websites is much simpler.
- Using the Pages tab on the left, browse to the page you would like to sell your events on. I personally like to create a dedicated events page:
2. Hover over the area of the page you would like to add Event Calendar App to and click edit.

Click the plus arrow on the right hand side:

And choose the code element:
You can then paste your Event Calendar App embed code.
Squarespace Commerce vs third-party ticketing apps
Now you know about both methods to sell tickets on Squarespace, which one do you choose?
Let's forget about the other features you might want for a second. One of the biggest problems with using the Squarespace Commerce system is that it's difficult to see who's coming to each event. And what's fundamental to running a good event? Knowing who your attendees are.
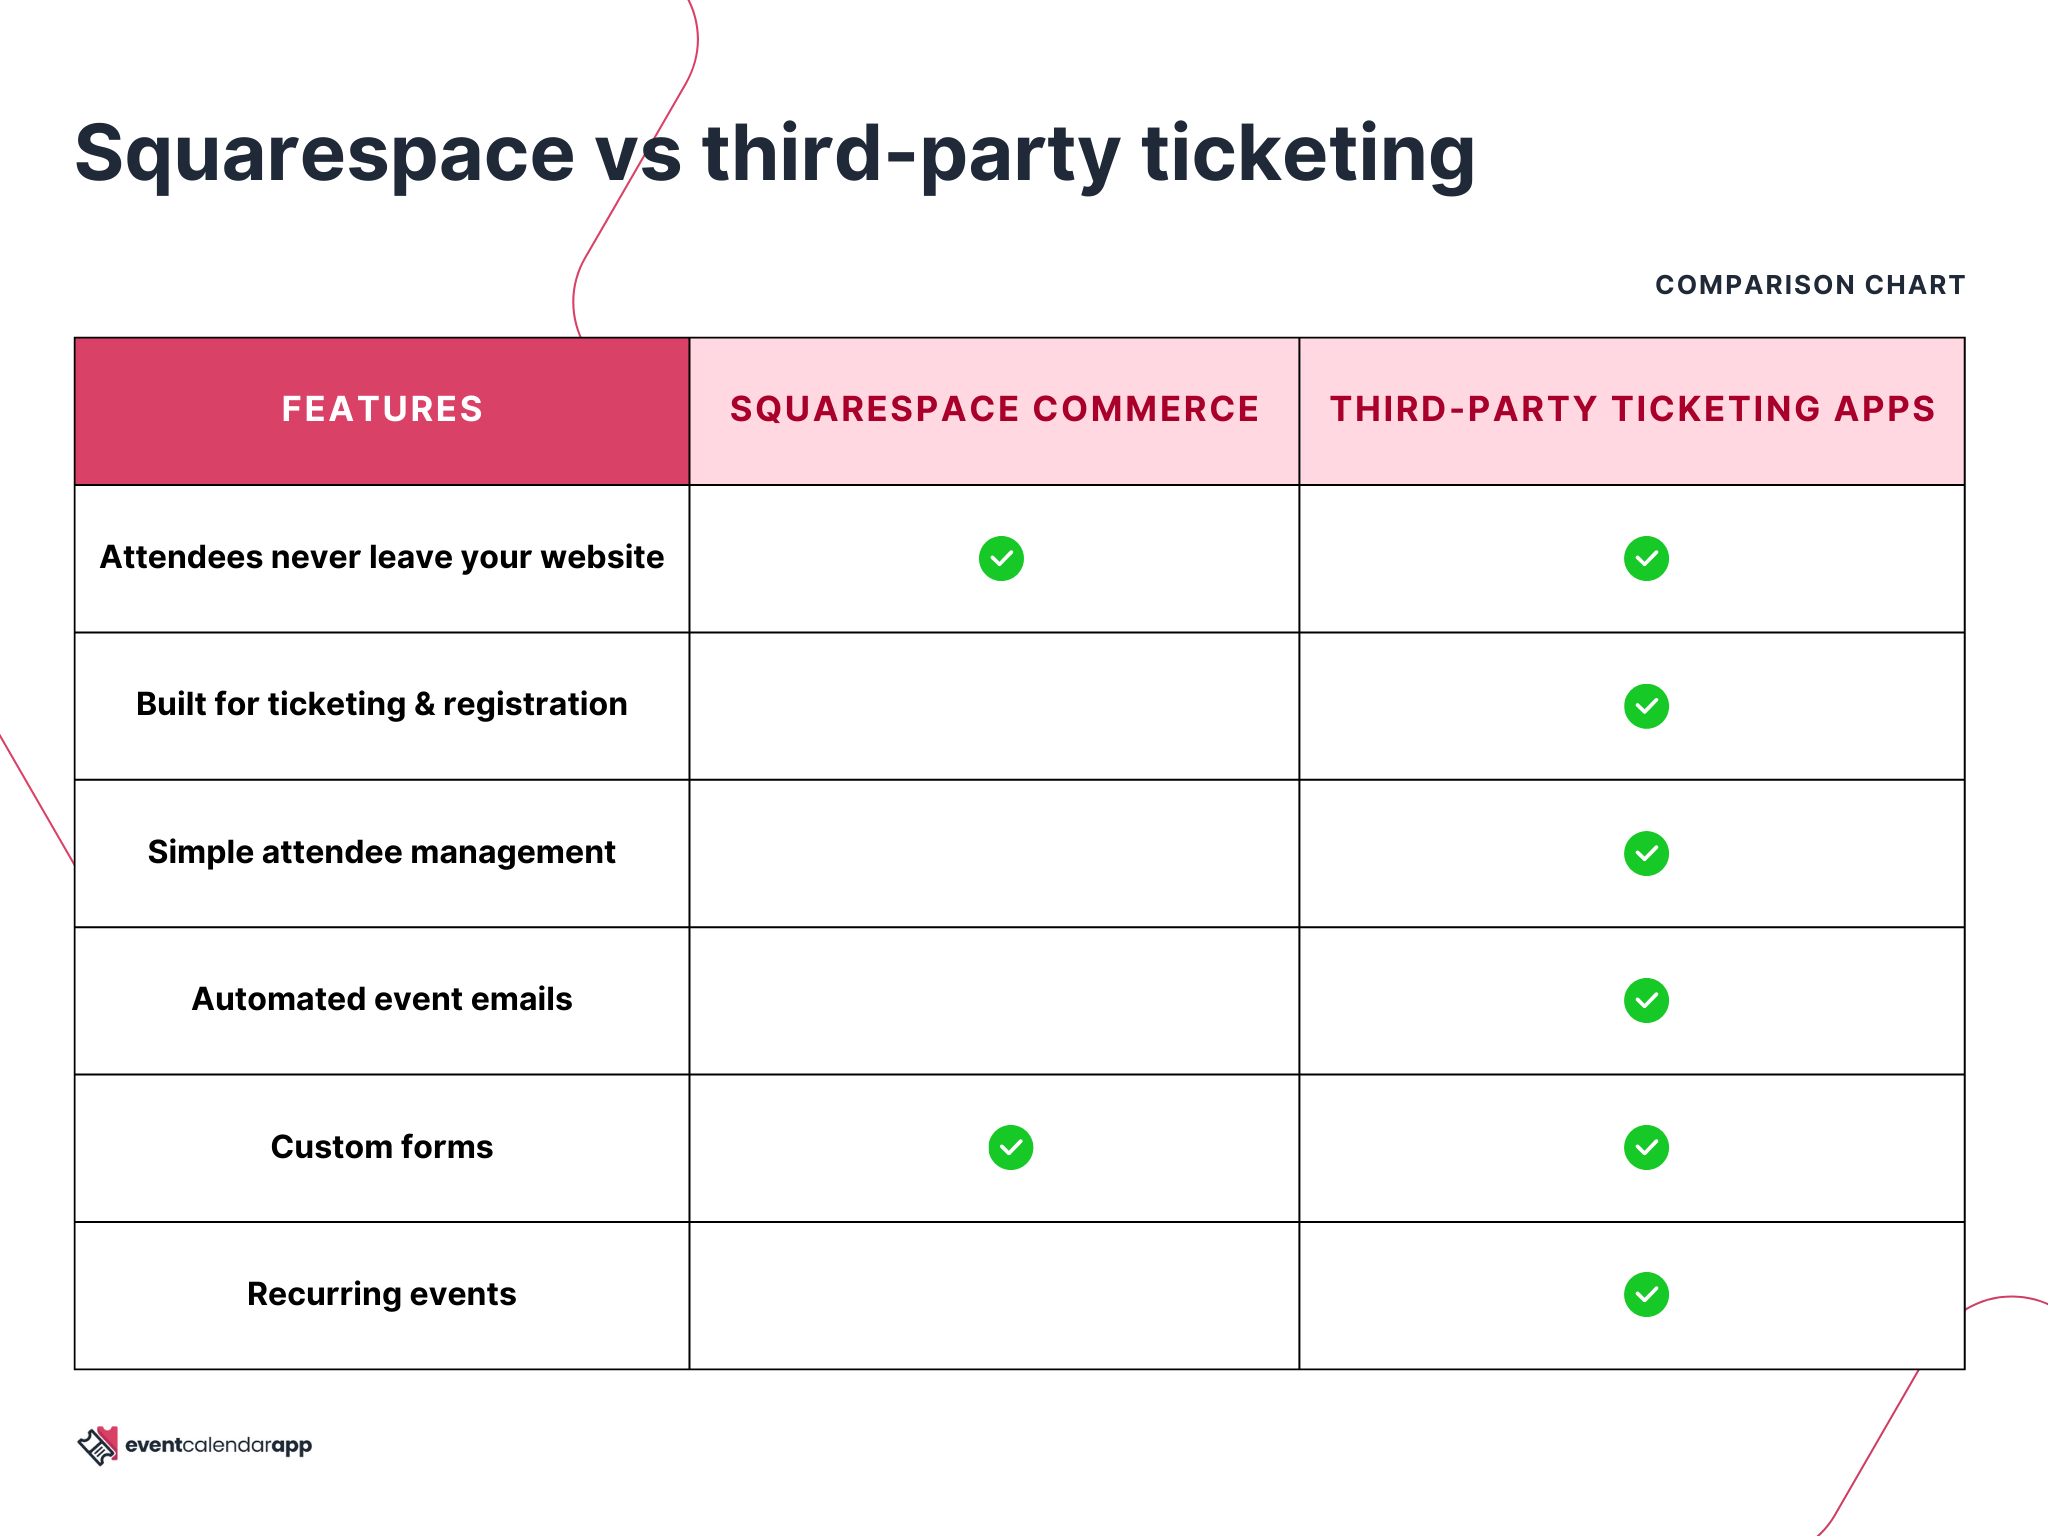
Squarespace Commerce is also frustrating to use if you are a business that runs regular events. There's no support for recurring events, and creating new events feels cumbersome and time consuming.
On that basis, it's difficult for me to recommend using the Squarespace Commerce system unless your needs are super basic - maybe you're running a one off event for example, and you don't need any (or just a few) ticket types.
As an event organiser you're going to save significant time with a tool built for you that has all the features you need.

Written by Alex Perry
Hey 👋, I’m Alex, founder of Event Calendar App. I’ve been helping event organisers for nearly 10 years with events, classes, courses and workshops. Here's what I've learnt that might help you too.
