How to sell tickets on your website
There's a lot of different tools that will let you, in some way or another, sell tickets from your own website. In this example we're going to use Event Calendar App as it is the only ticketing tool that was designed from the ground up to be used on your website.
Event Calendar App lets you create a widget that you can add to your website. This will display all of your events and let you sell tickets to them.
A lot of other services have embeddable widgets you can use, but these often just serve as a way to take you back to their platform, or they severely lack in functionality.
Let's go...
Step 1 - Get started
Sign up to Event Calendar App. It's completely free to get started, and you can test all of the features out without even starting a trial.
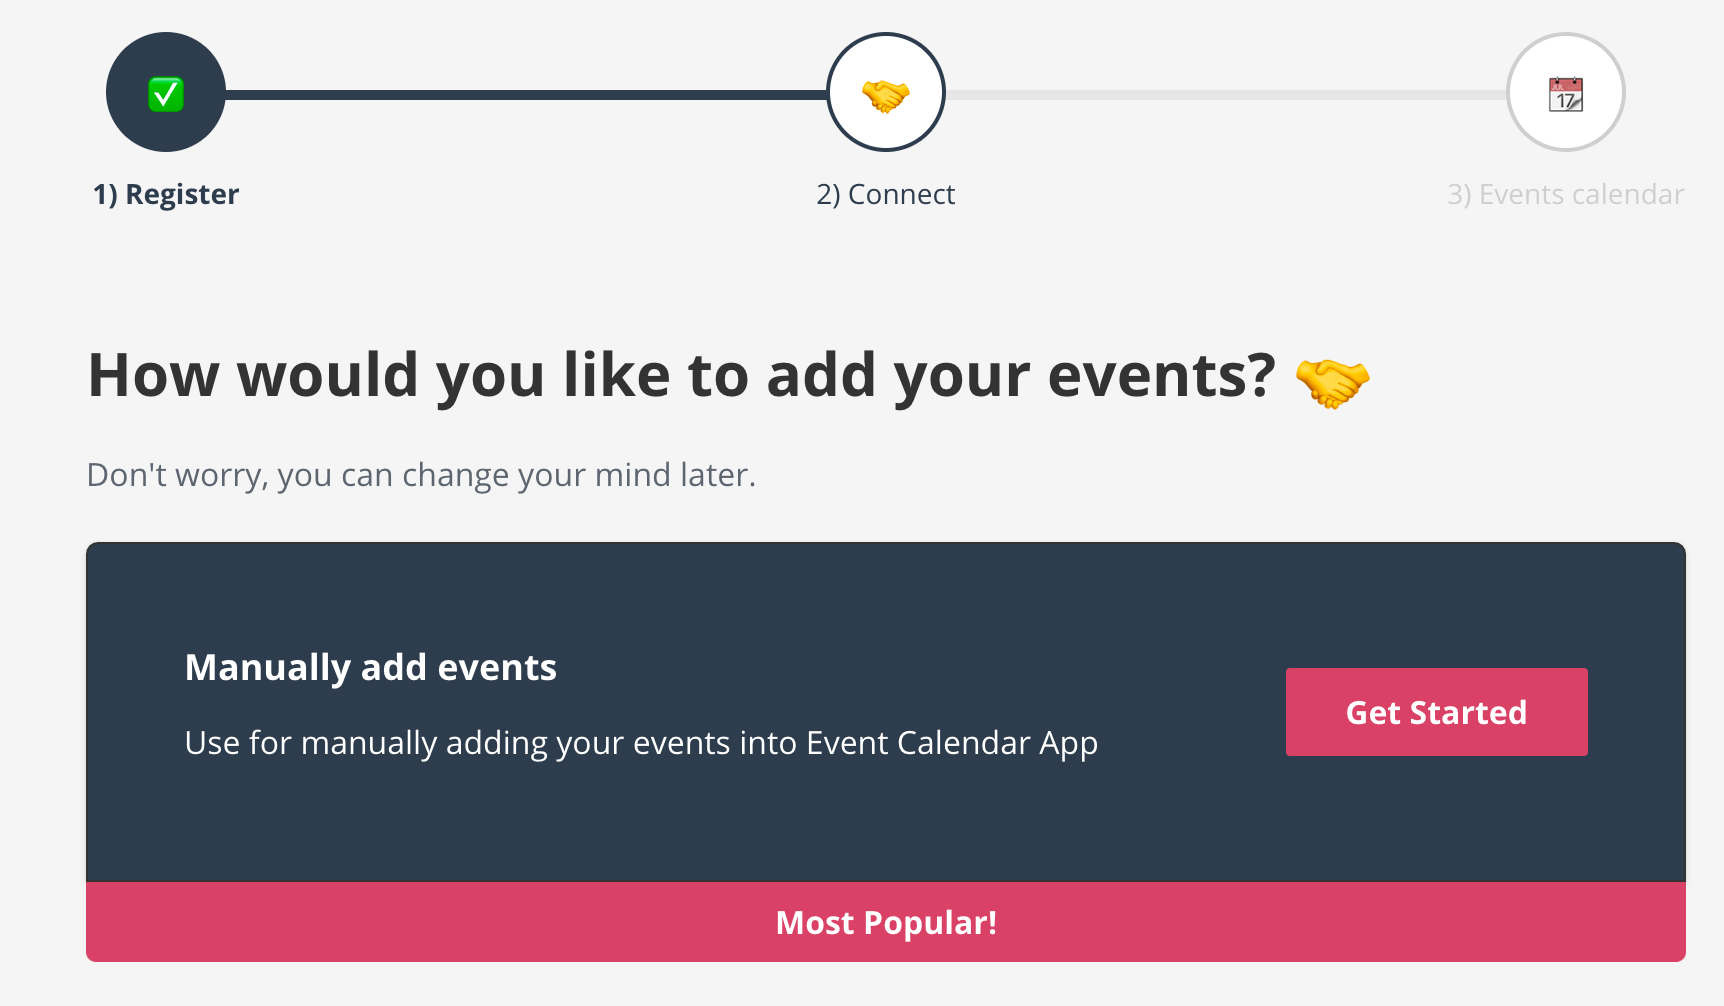
The first thing you'll be asked is how you want to input your events. You can sync with an external calendar if you have lots of existing events, but in this example I'm just going to add them manually.
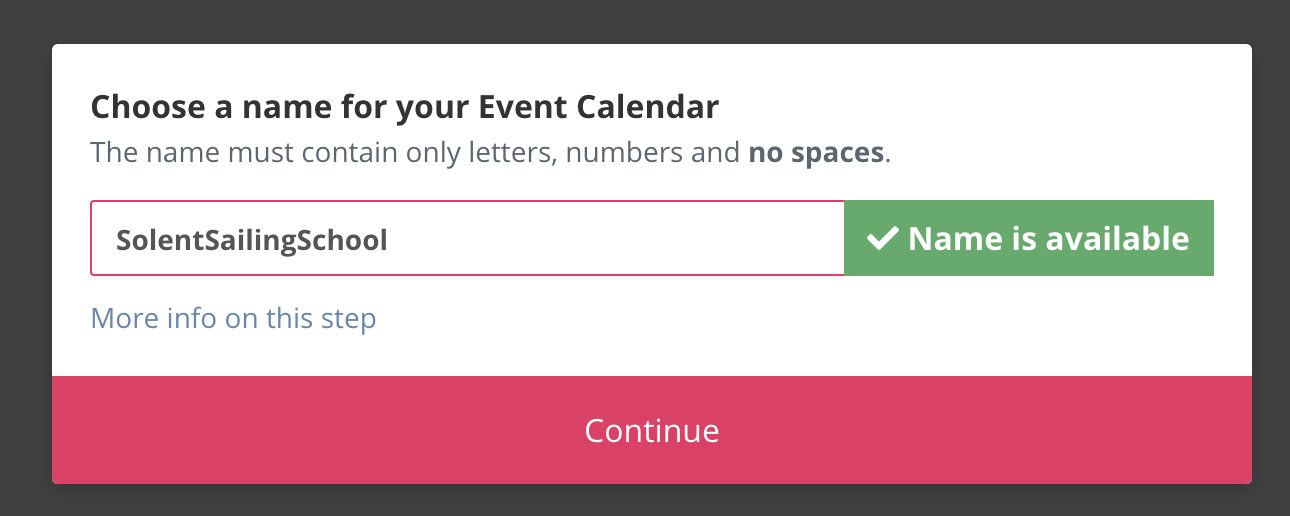
You'll then have to choose a name for the widget. In this case, I'm going to create it for my fictitious sailing school 'Solent Sailing'. This company sells places on their sailing courses.
Step 2 - Add some events
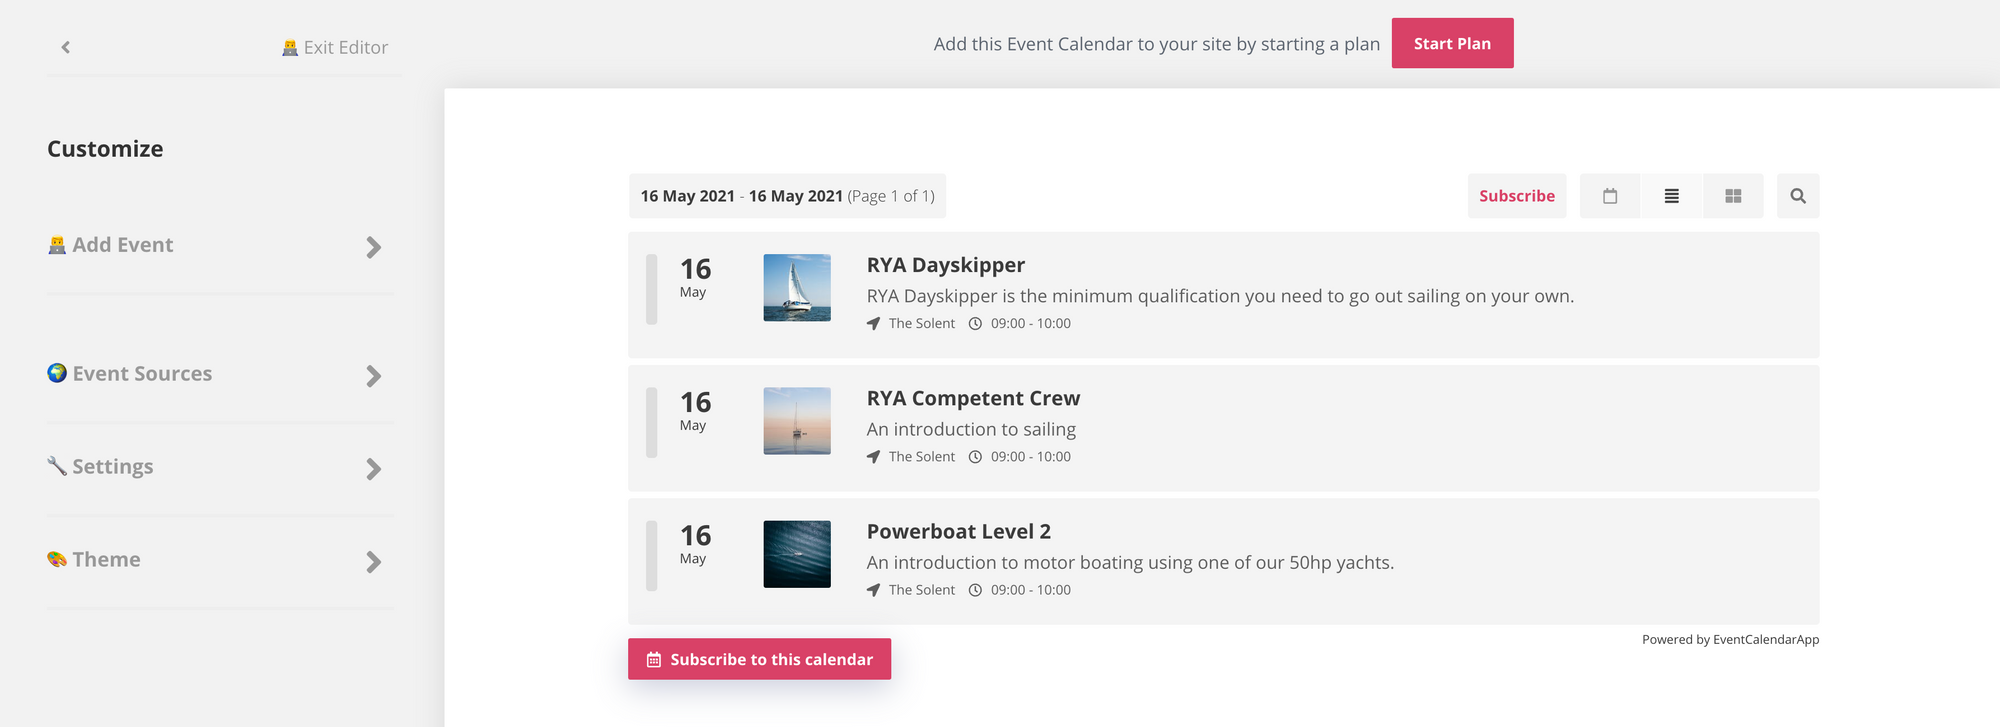
Ok, so you're now into the editor. This is where you will create the thing (or widget) that will be added to your website. What you see on the right is exactly what will be placed onto your website. On the left is the editor panel that gives you control to make changes.
Let's add our first event. Fill in the details on the left and click Add Event.
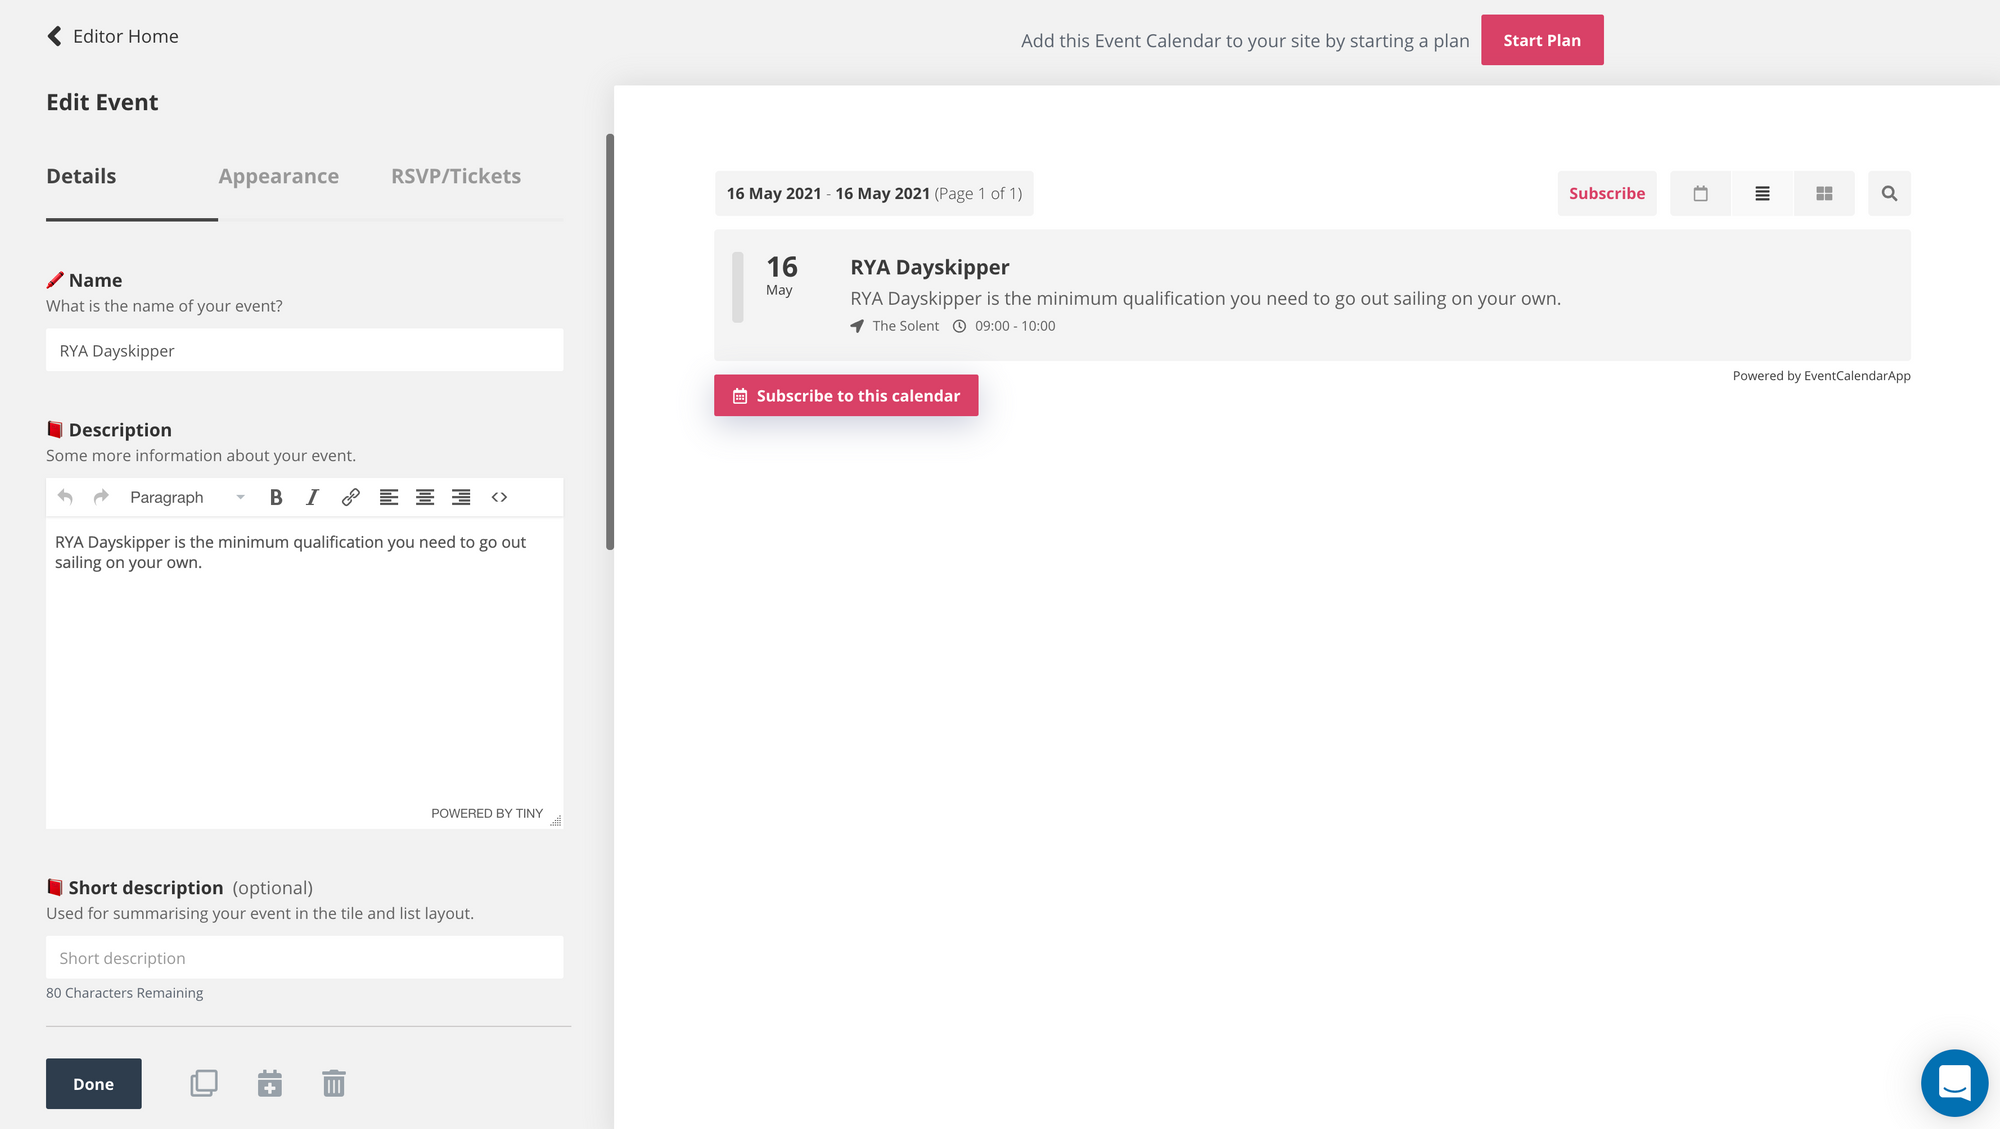
See how the event now appears on the right - this will continue to update as we make changes.
At this point you can go ahead and add a few more events if you like. I'm going to add some more.
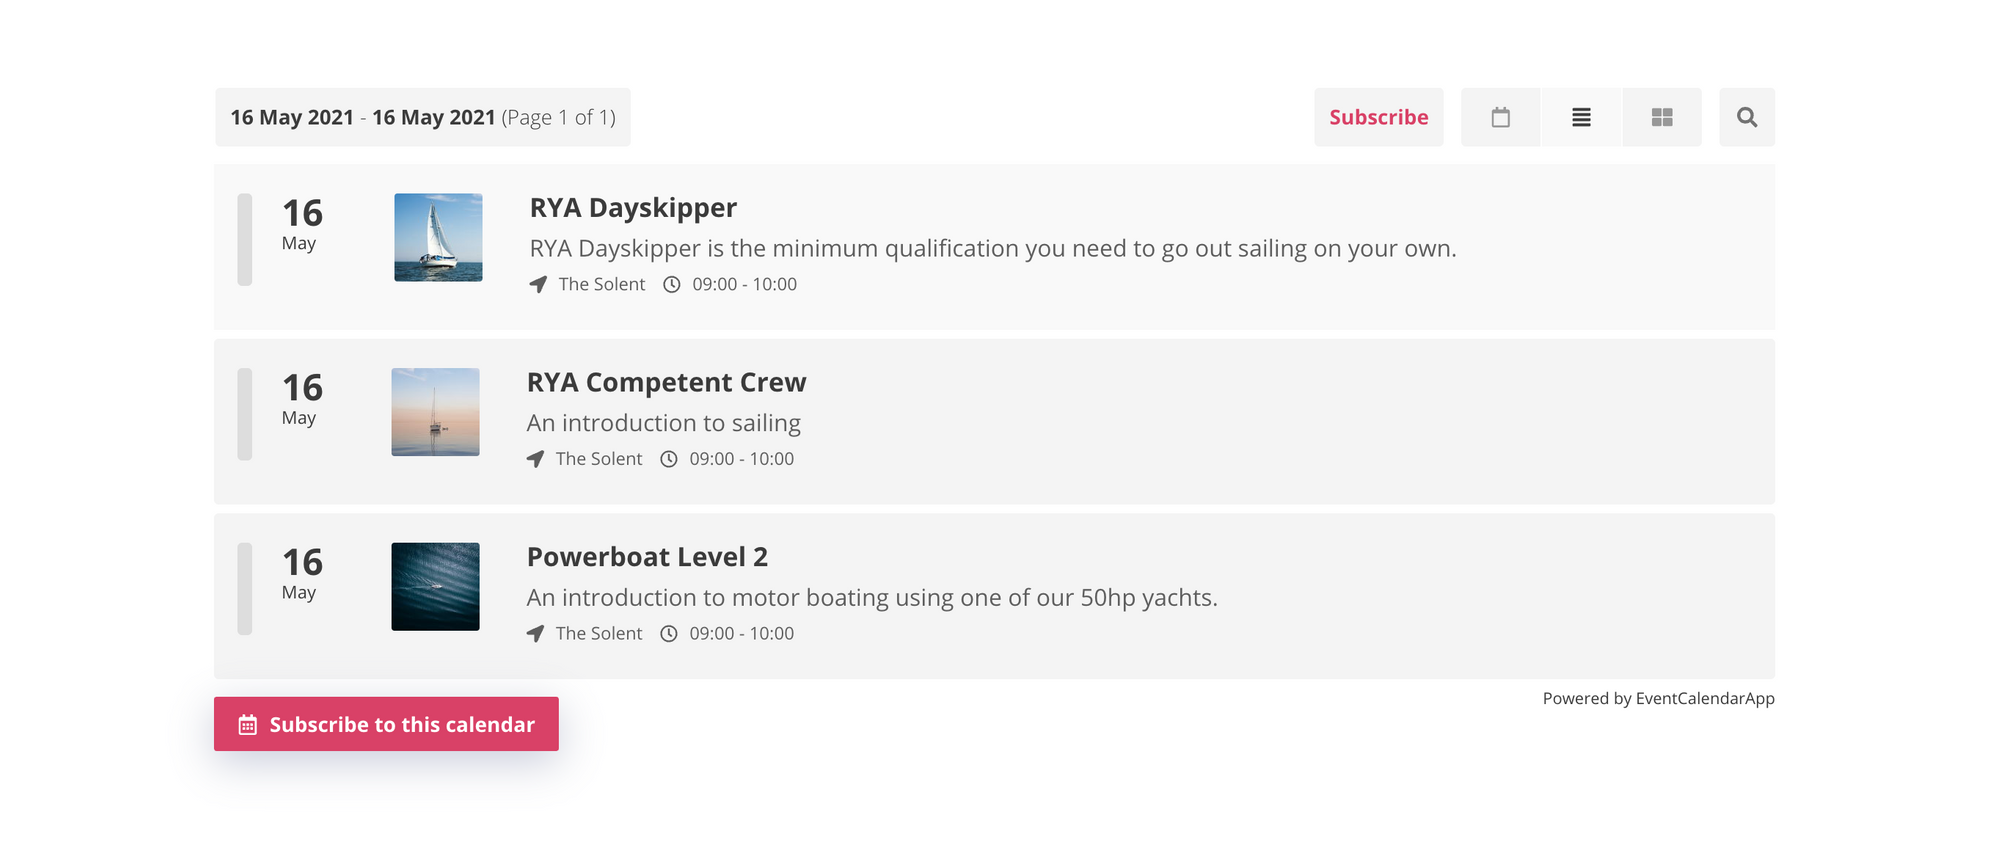
You can also use the appearance tab to add some images to make the events look better.
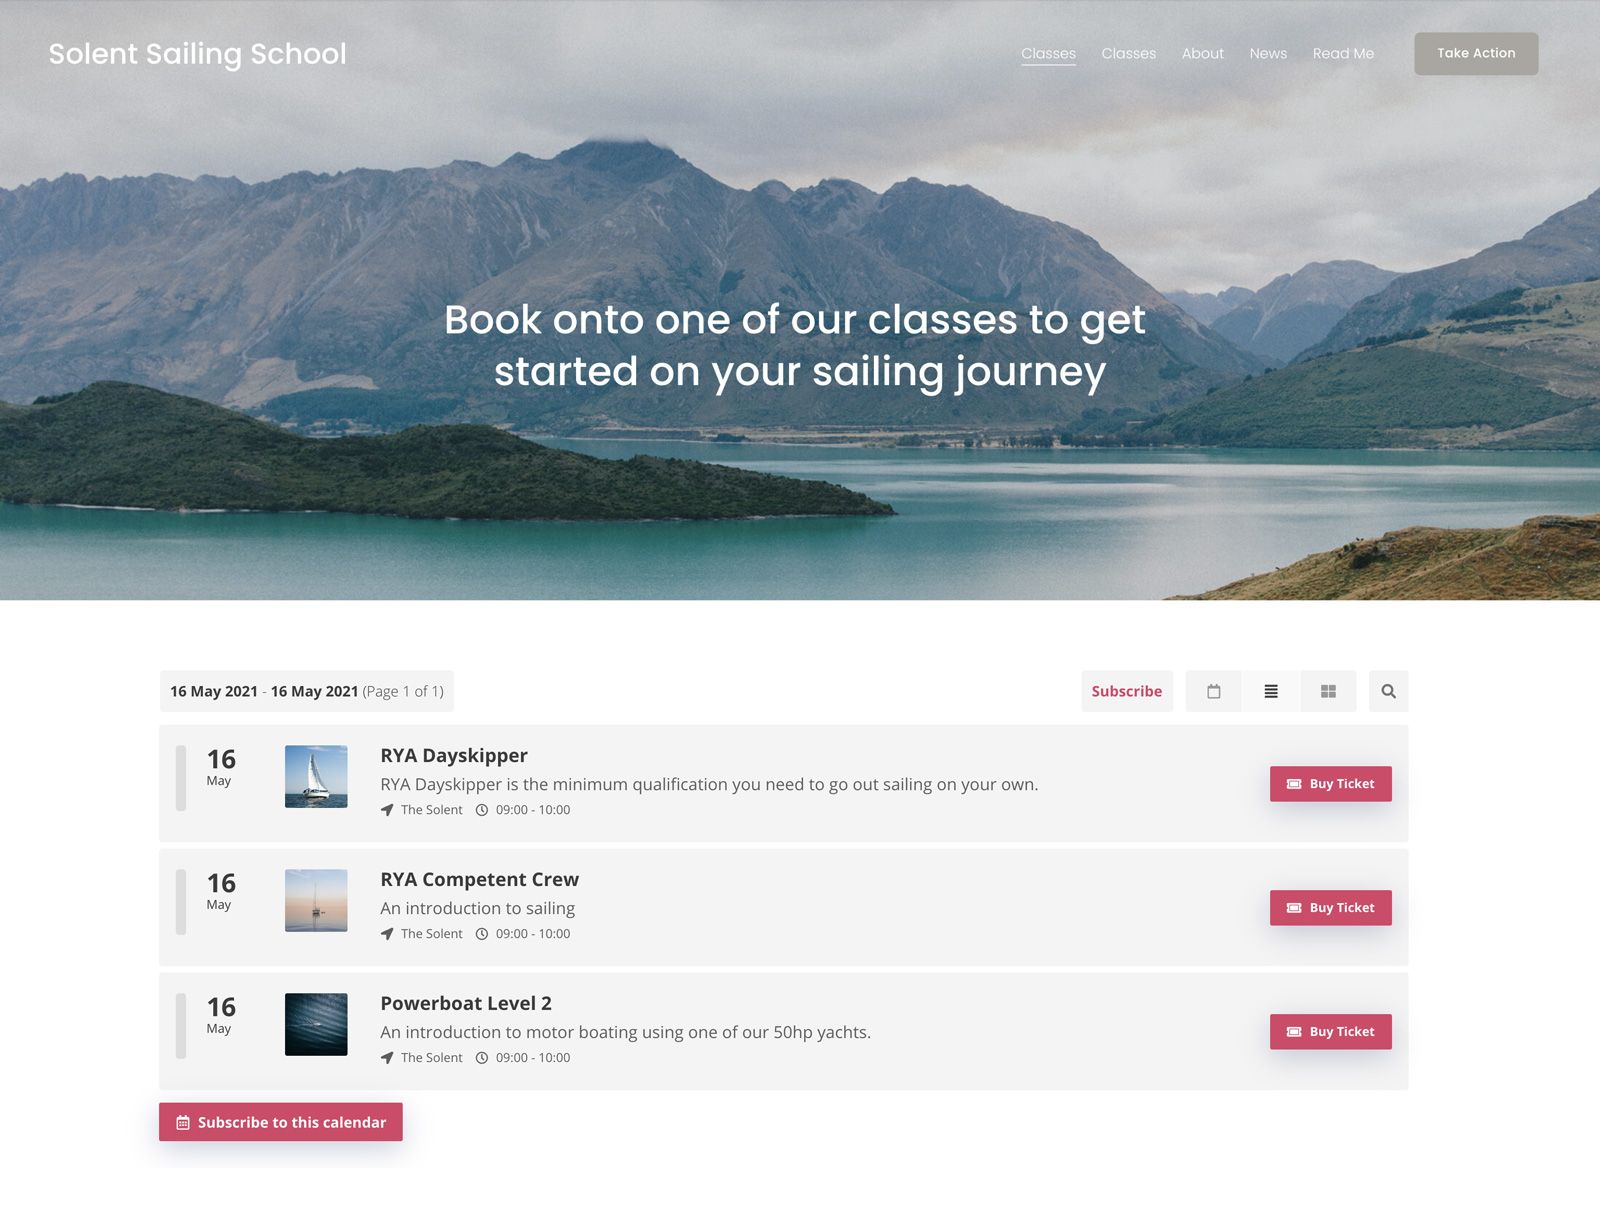
Here's what my widget looks like now:
Step 3 - Configure Stripe
Fantastic, so you could now add this to your website and your customers would have a way of browsing through your events, but not buy anything - yet. The next thing we need to do is configure ticket sales.
Event Calendar App integrates with Stripe to enable you to take payments. Stripe is the service that acts behind the scenes to take credit card details and actually charge them. The beauty of Event Calendar App is that there's no middle man and fees are paid directly to you.
You need to set up a Stripe account and then plug it into Event Calendar App so that the app can take payment for you
Setup and activate stripe account
Head over to Stripe and create an account. Stripe will guide you through a few steps to activate your account. When your account is correctly activated you should be able to toggle between live and test mode, you can see the icon for this on the left:

If you cannot activate live mode then you need to complete activating your account.
Add your stripe keys to Event Calendar App
Adding your Stripe keys to Event Calendar App is effectively you giving the application permission to use your Stripe account to make payment for you.
On the left, inside of Stripe click Developers -> API Keys.

On this page (I can't show you mine sorry!) you will see a publishable and secret key. Make a note of both of these for the next step.
You now need to add these keys into Event Calendar App. Back in Event Calendar App, exit the editor (by clicking Exit Editor in the top left) and head to the settings page. There is a section here where you can add your keys:
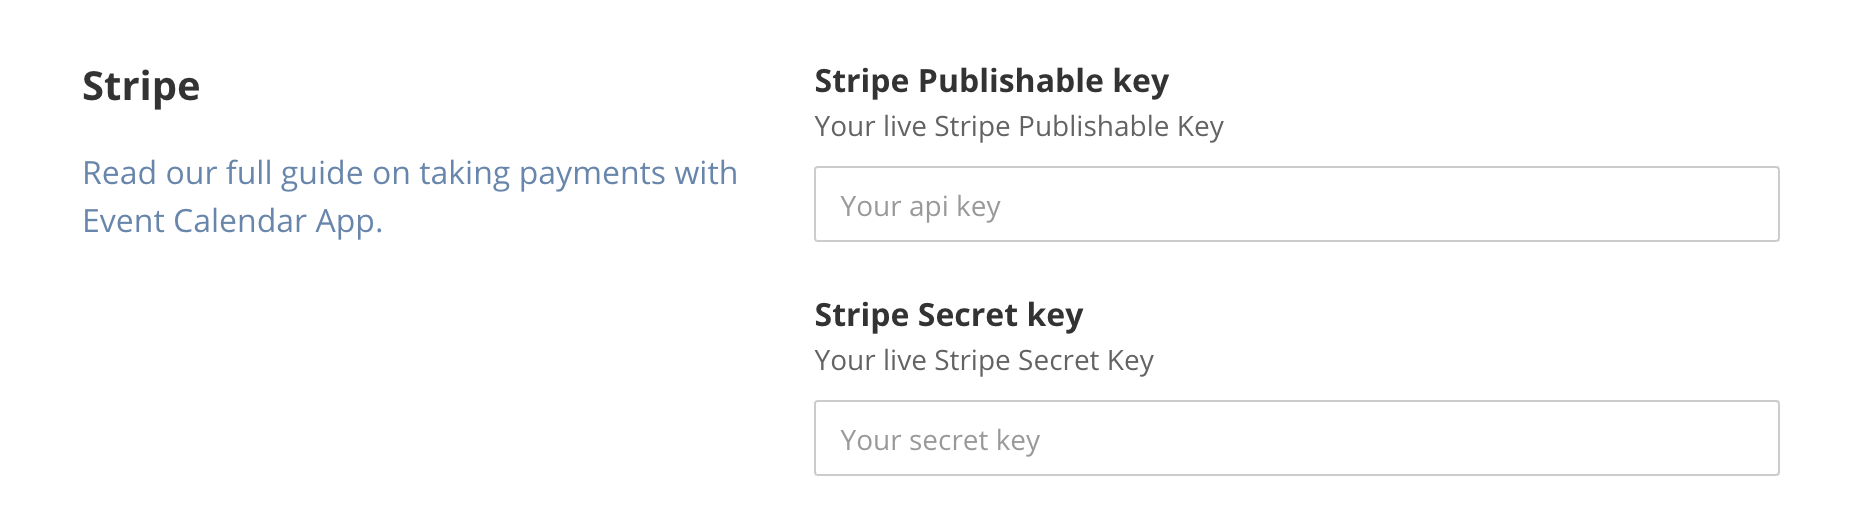
All done! Your widget is now ready to handle payments.
Step 4 - Configure ticket sales on your events
Within Event Calendar App, head back to the widget editor. You can do this by going to the dashboard and clicking on the widget you wish to edit. You should now be back at this screen.
To edit anything about an event, all you need to do is click on it. This changes the side panel and shows you all of the configuration options.

You now need to click on the RSVP/Tickets tab. This will show you all of the options for configuring either RSVP collection or tickets.
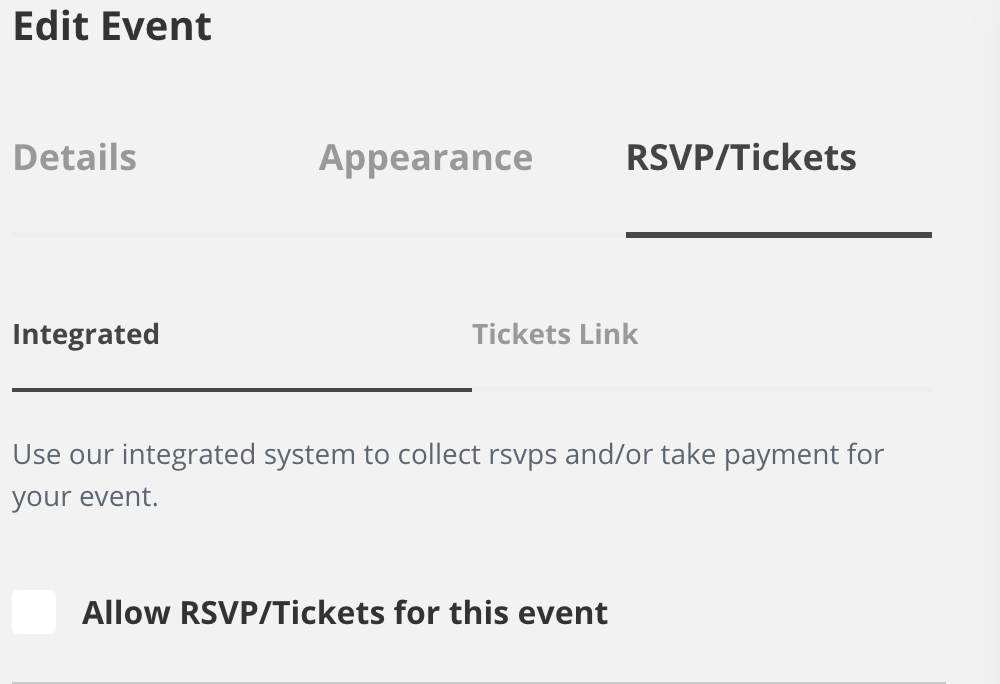
Click "Allow RSVP/Tickets for this event". And then click the Require Payment option.

I have also changed the button text to say "Buy Ticket".
You will see that a button now appears on the right hand side of the event.

Clicking this button opens a modal that allows your customer to purchase a ticket.
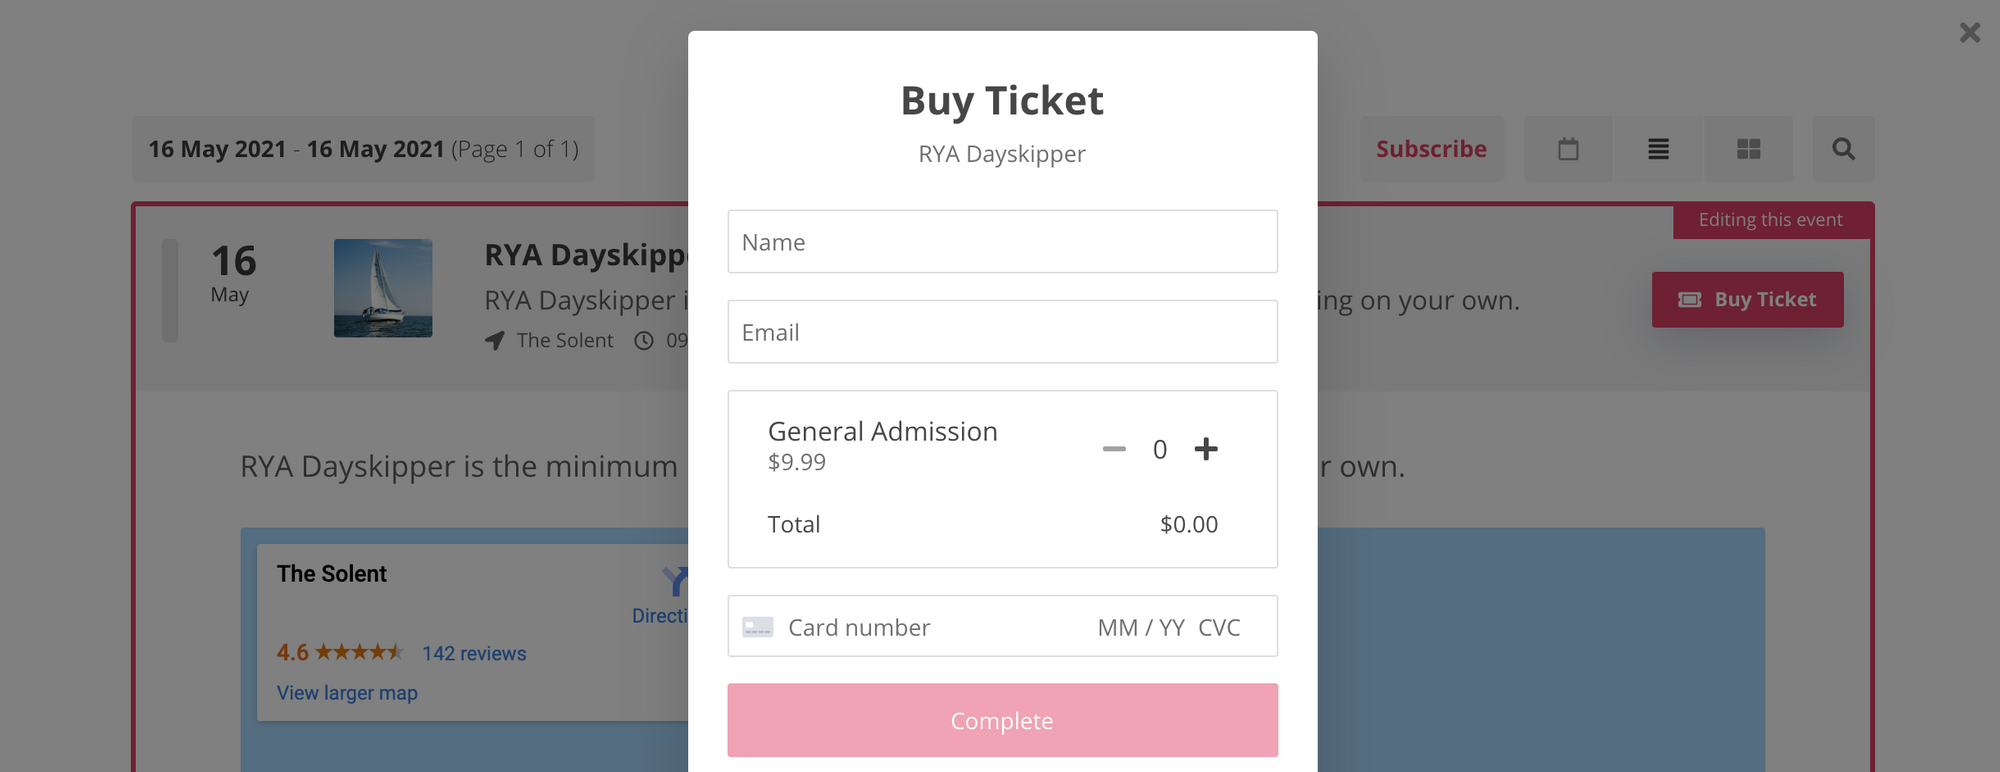
You will see, in the settings panel, that there are a lot of things you can change for the purchasing process. You can add different ticket types, set limits to the amount of tickets that can be sold, and add additional fields that your customers need to fill out.
In my case, I changed the prices, ticket types and added some additional information that my made up company needs:

Step 5 - Add the widget to your website
The final thing to do is add Event Calendar App to your website.
This requires that you start a payment plan. Event Calendar App has a 7 day free trial, so you can always cancel it if you're not happy with anything. You can start a plan by clicking the 'Start Plan' button at the top of the editor and following the steps.

You will then be given an embed code which you can use to add the widget to your website.
The exact steps to do this will vary depending on how your website is built and what kind of website builder you are using (if any).
Some specific integration guides can be found here for Event Calendar App:
https://support.eventcalendarapp.com/en/collections/325865-third-party-platform-integration
Simply, most website builders have some sort of 'code' or 'embed' option that allows you to add third party applications. And if you're coding your website yourself, it's as simple as pasting it into the source code.
In my (fictitious company's) case we have a Squarespace website, so I use their code block functionality to add the widget to my website.
Looking good!
Customers can now browse all of our courses and buy tickets. They can also subscribe to the events, so that they'll be updated whenever we release any new courses.
All done! So what happens when someone makes a purchase?
When one of your customer makes a purchase, a few things happen:
1) Event Calendar App sends you an email to let you know that you have just received a purchase.
2) We send your new customer an email that contains all the information about the purchase that they have just made.
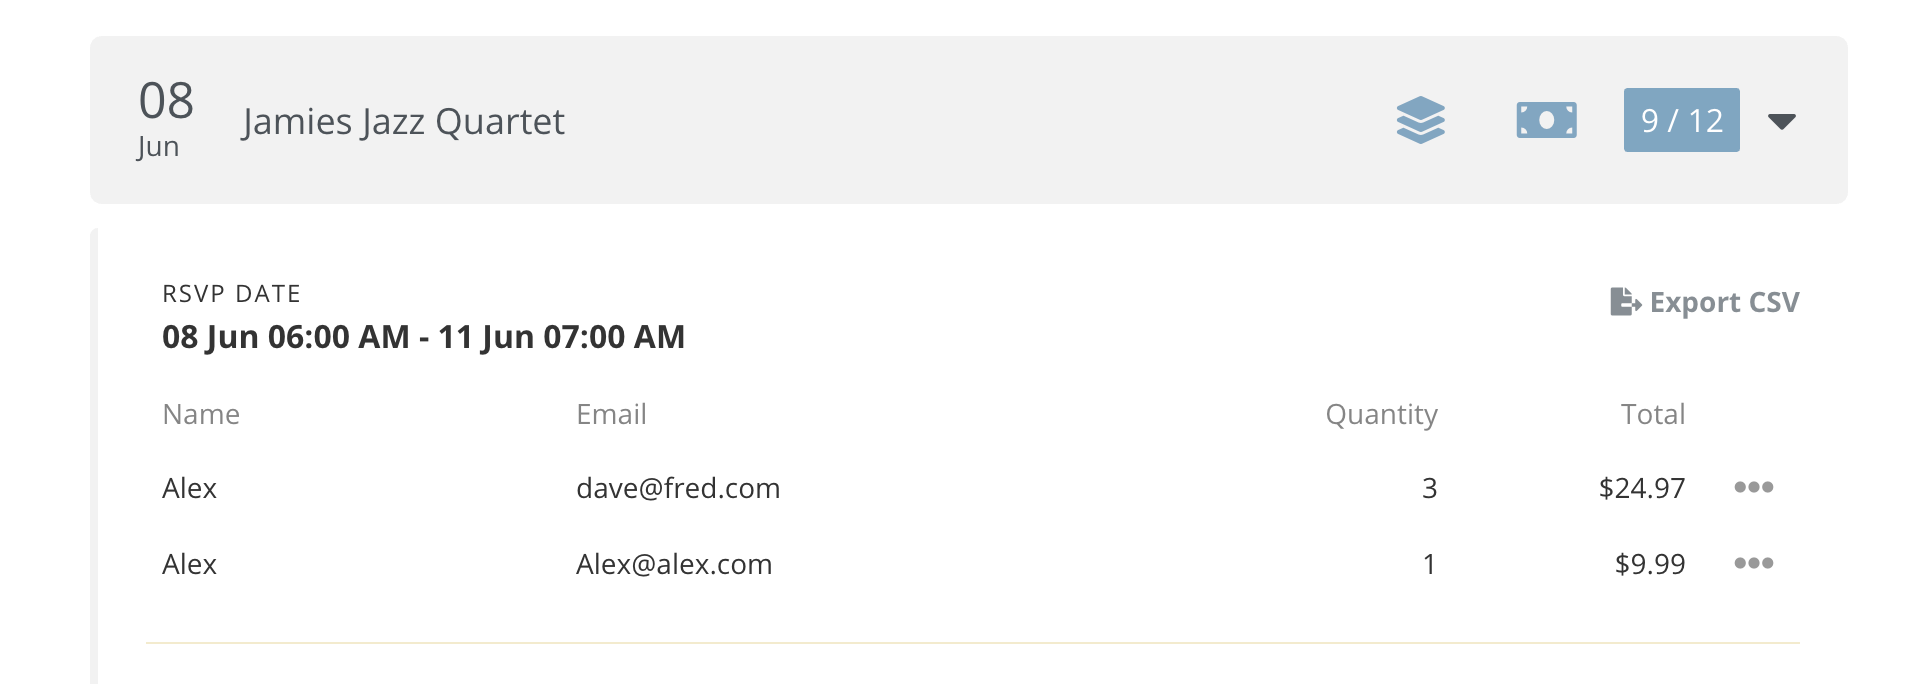
3) Your new customer, their payment and details, appears in your dashboard.
Your dashboard allows you to see all purchases that have been made for each event.
That's it, you're ready to go.
If you have any questions at all about Event Calendar App, please get in touch.

Written by Alex Perry
Hey 👋, I’m Alex, founder of Event Calendar App. I’ve been helping event organisers for nearly 10 years with events, classes, courses and workshops. Here's what I've learnt that might help you too.
